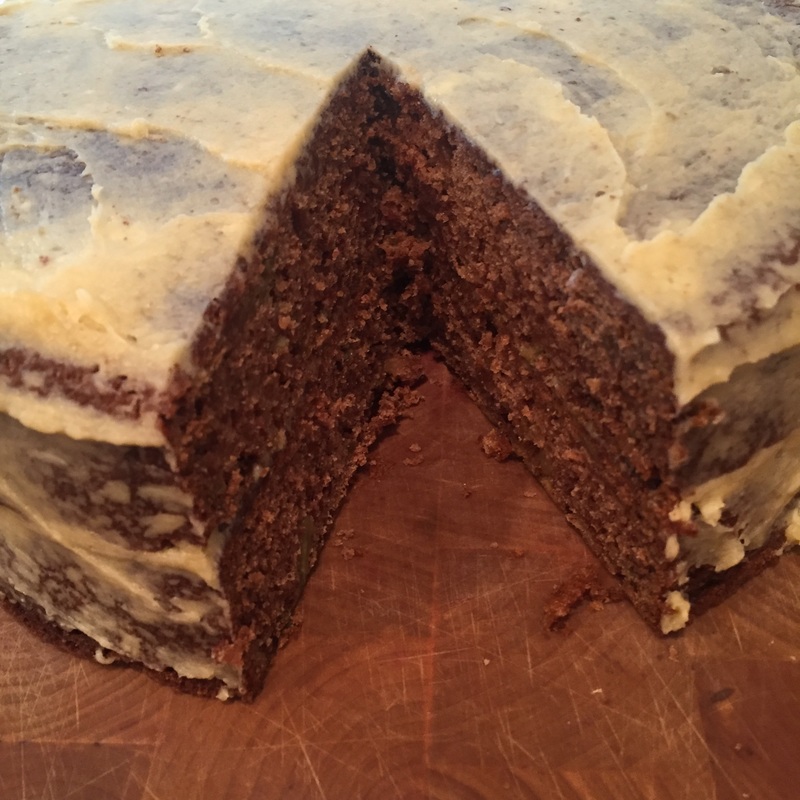
 Last year we made apple molasses, apple sauce, apple pie, dehydrated apples, everything apple. This year the trend continues with apple cake. I found the recipe in The San Francisco Ferry Plaza Farmer's Market Cookbook, and it's as easy as making muffins. Dump, dump, stir, bake. The dough tasted a little bitter from the baking soda and I had serious doubts, but it was wonderful the next morning for breakfast. It was not too sweet, and everyone was relieved not to have to eat eggs or oatmeal again. Try it and you'll see. We "iced" the cake with a mixture of butter and honey. Ingredients: 1 Tablespoon unsalted butter or spray for the pan 1-1/2 cups coconut oil, warmed to be soft if necessary 1-1/2 to 2 cups brown sugar 4 eggs 2 cups flour (I used a gluten-free mix) 1 Tablespoon baking soda 2 teaspoons ground cinnamon 1/2 teaspoon ground nutmeg 1 teaspoon salt 3 cups of grated unpeeled Granny Smith apples 1 Tablespoon vanilla extract Directions: Spray or grease two 9 inch cake pans and preheat the oven to 325. Mix the coconut oil, sugar, and eggs in one bowl. Mix the flour and the other dry ingredients in another bowl and then add them to the wet ingredients. Stir until combined, and then add the grated apple and vanilla. Pour half the batter into each cake pan and bake for 35-40 minutes. Test it with a toothpick in the center when you think it's done. After you take the cakes out, let them sit in the pans for about ten minutes before unfolding them and letting them cool. We "iced" our cakes with a mixture of butter and honey. 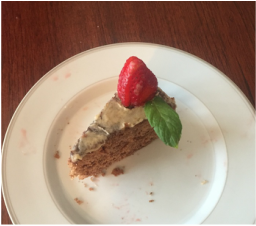 Painstakingly decorated and photographed by my nine year old son.
0 Comments
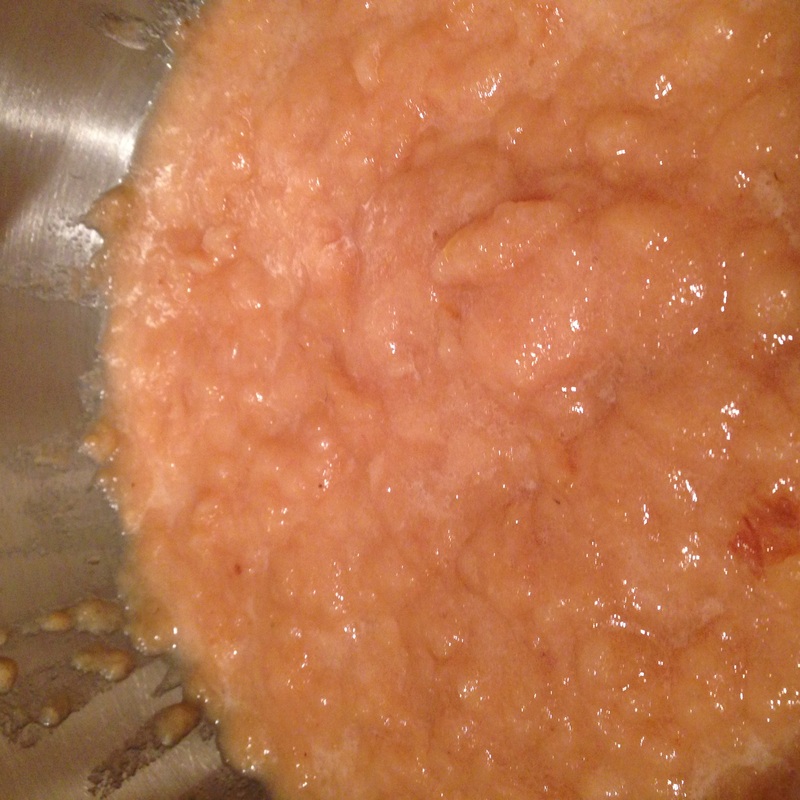
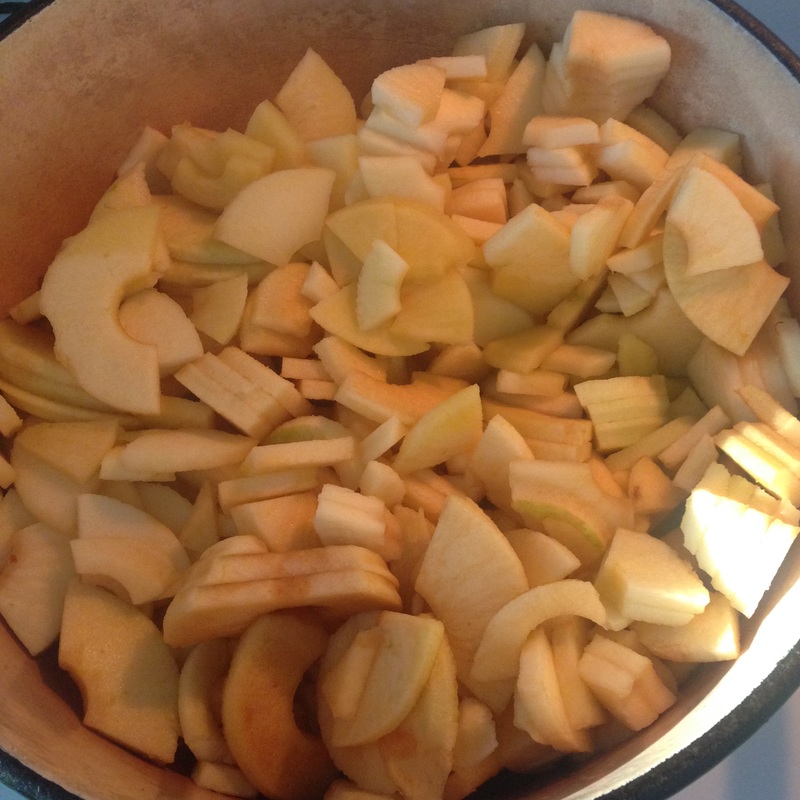
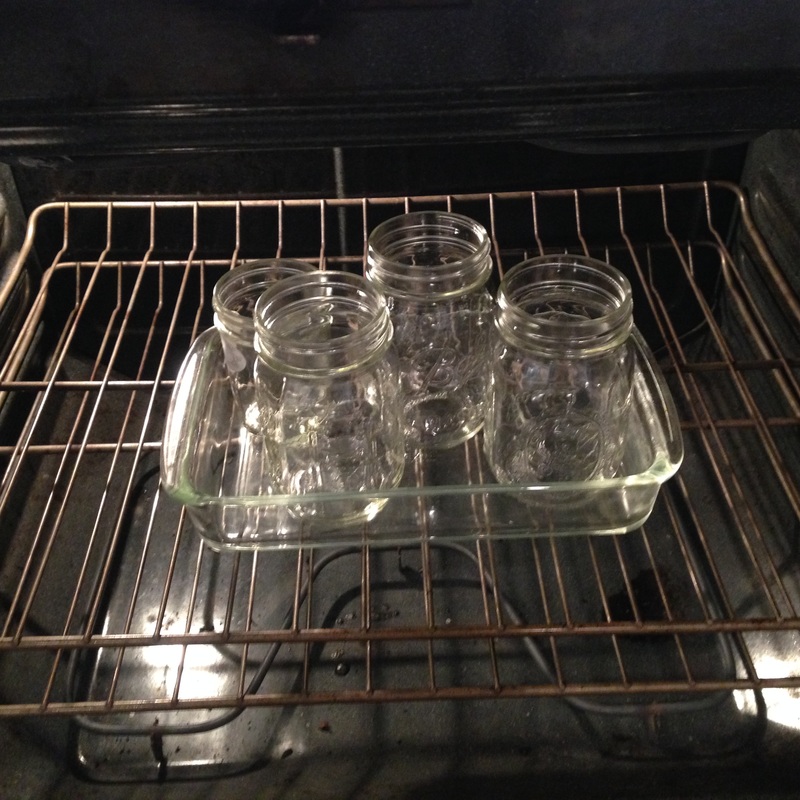
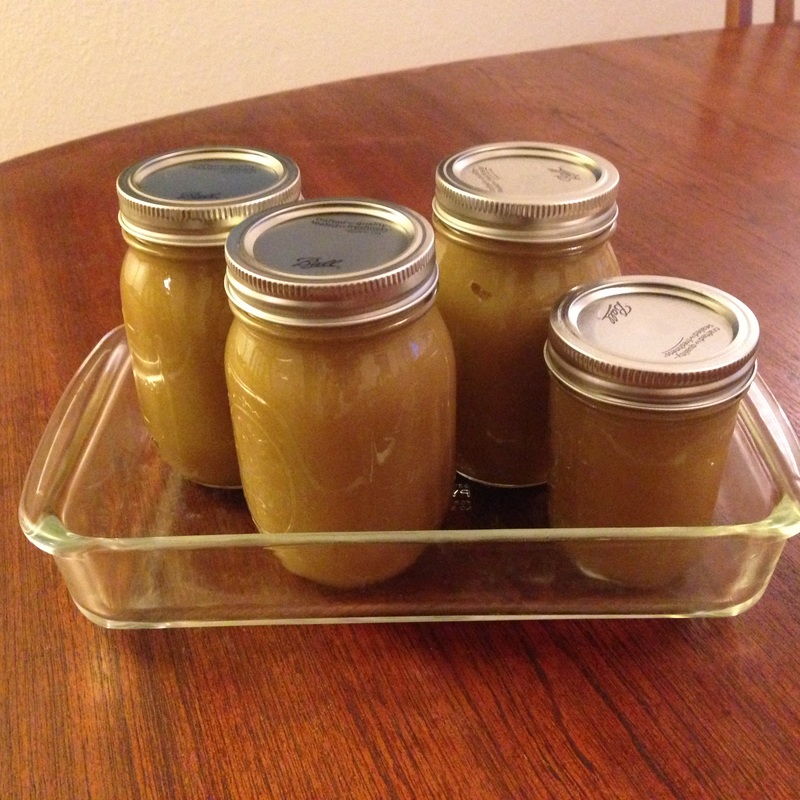
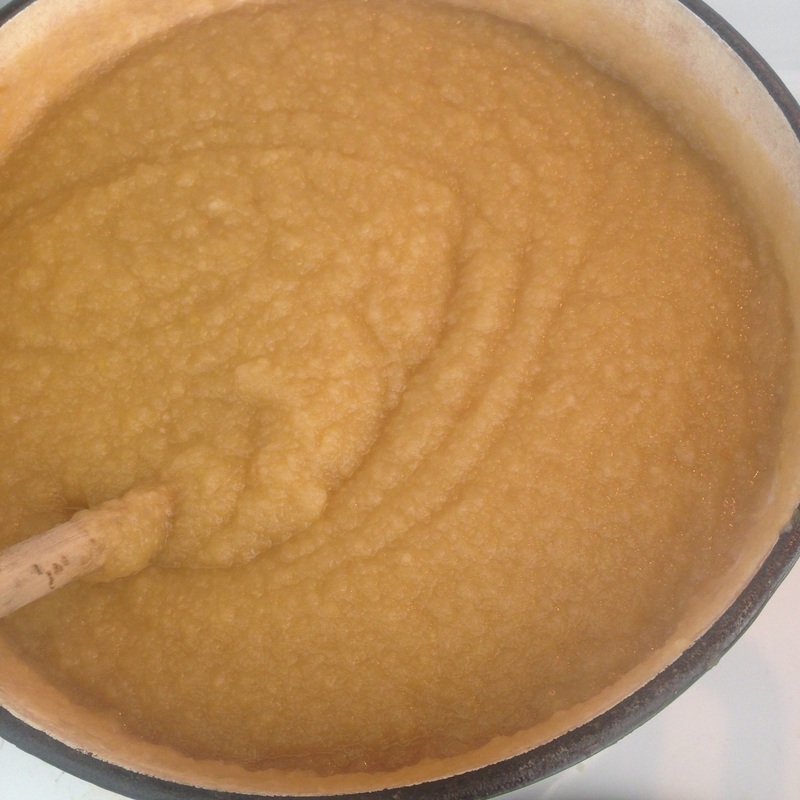 I don't know why I never tried making applesauce before, but it's really simple. Core, peel, chop, boil, and blend. That's it! I made so much of it that it was worth canning rather than freezing. Unfortunately, I had to process it in three batches because the canning jars I had were only half pints. In case grade school is a few years behind you and you need a refresher, that's a complicated way of saying one cup. I can't believed I canned applesauce by the cup! So ridiculous. It was a pathetic, sweaty process and it left me thinking my canning days were over FOREVER. Then I got a great tip from my mom. There's an easier way. Canning is one of those simple things that are so over-explained that it's tempting not to bother at all. Every single last cookbook on canning reads something like this, "If you get this wrong, please don't sue me, and don't say I didn't warn you. Canning is dangerous. You can kill your whole family if you don't boil every single surface of your kitchen. Follow my directions, double-check it with the Ball Blue Book of Canning, and remember that if something horrible happens, you're on your own. Turn the page to sign a waiver before proceeding." (It's true that the sugar level and acidity all have to be just right, so yes, you should follow a recipe. Canning has rules.) And then those of us dumb enough to keep going have to slave over a hot stove while all that boiling water melts off your makeup. However... (What I am about to say might be illegal, I don't know, but I'm not advising you. Consult with your doctor, the Ball Blue Book, whatever. Please don't sue me.) The "normal" process is to boil your clean jars, lift them out of the boiling water onto a clean cloth, fill them with piping hot jam or whatever you're canning, top them off with canning lids that have been sitting in very hot water, and then boil them for a specified period of time. After removing the jars from their boiling water bath, you let them sit undisturbed until they cool and contract, causing the lids to seal. The daring process probably practiced all through America and Europe before we all got scared was to fill the clean jars with piping hot jam up to a quarter inch from the rim, put the lids on, and then flip them upside down and hope the hot jam sterilized the already clean lid. I've tried this method, and while it worked just fine, I was too scared to give any of it away. My mother's method beats both of those in my opinion. It makes sense to me, and this is how I do it now. Remember, water boils at 212 degrees Fahrenheit. So instead of all that boiling, put clean jars in a 250 degree oven on a baking sheet. When your jam or applesauce is ready, lift out the baking sheet and fill the jars. Put the lids on them, and then put them back in the 250 degree oven for half an hour. Most jam recipes call for ten minutes of boiling, so by leaving them in the oven for half an hour you're just hedging your bets. Take them all out and leave them until all the lids have sealed. (If one doesn't seal, refrigerate it.) Done. No more endless boiling, and I am still alive to tell the story.
Ingredients: Peeled, chopped, and cored apples Directions: Put all the apples in a heavy saucepan. Add a little water to keep them from burning on the bottom, and put them over a medium flame. Bring it to a boil and then stir. The apples cook pretty quickly. Once they are cooked, puree them in batches in a blender or a food processor. The cooking portion is done, and if you'd like to can your applesauce, it's really not that hard anymore. Canning Directions: Put clean canning jars in a heated 250 degree oven. Bring the pureed applesauce back to a boil on the stove. Take the jars out of the oven, fill them, and put clean lids on. Put them all back in the oven for thirty minutes. After the time is up, take the tray with the jars out of the oven and leave them to cool. They are sealed when the lid doesn't pop anymore. Done!
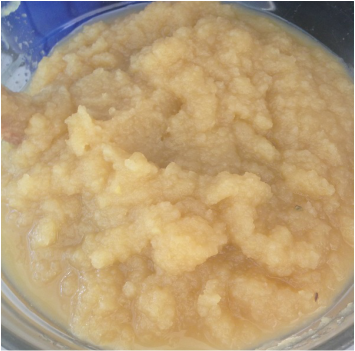
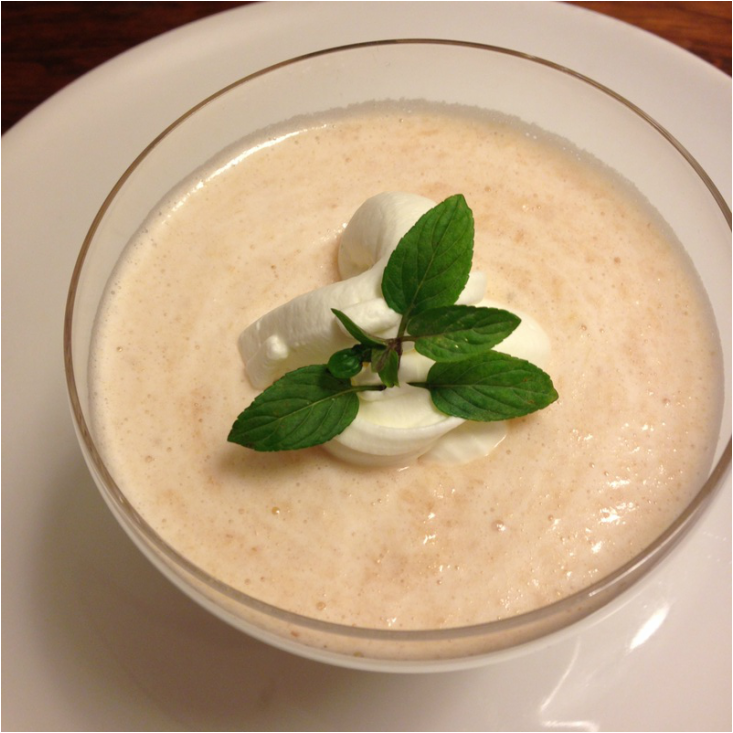  This is the best dessert you've never tried. It's elegant and simple and can be made ahead. I had no idea what to expect when I tried it, but it's a delicate apple mousse. I never expected a dessert like this out of the land that produced goulash- no lard, no paprika, not even sour cream! My first thought, since I had never baked apples before, was to figure out how much pulp I got from 2 pounds of apples and then substitute applesauce, but the pulp from the apples is a little thicker and I think it would change the outcome. However, I got just over 2 cups of pulp, so if you don't have a food mill or an easy way to peel and core the apples before blending it, it might be worth a try. The apples I used had some red on them which tinged the apples a pretty pink hue. No, you don't cook the egg whites. Please don't let this stop you from trying this. It's wonderful! This is again from Countess Morphy's Recipes of All Nations. I included a photo of the recipe at the end of this post. Ingredients: 2 pounds apples juice from half a lemon 6 tablespoons sugar 1/3-1/2 cup whipping cream optional: fruit to garnish Directions: 1. Wash the apples and put them in a baking dish in a 350 degree oven for about 45 minutes until they are very soft. Take them out and allow them to cool. 2. Quarter the apples and run them through a food mill, or peel and core them and puree them in a blender or food processor. Set them aside. 3. In a clean bowl, beat the whites of two eggs until they are foamy. Add the lemon juice and sugar and finish beating until stiff. Use a spatula to fold these into the apple puree. 4. Wash out the bowl from the egg white and pour in the cream. You don't need to sweeten it because the apple puree is so sweet. How much you use really depends on how much you love whipped cream. Beat it until it's nice and thick (but stop before you end up with butter!). 5. You can serve everything together in one glass dish or make separate servings in individual glasses. Top with the whipped cream. Next time I will serve it either with shaved apple slices or raspberries if I can get them. 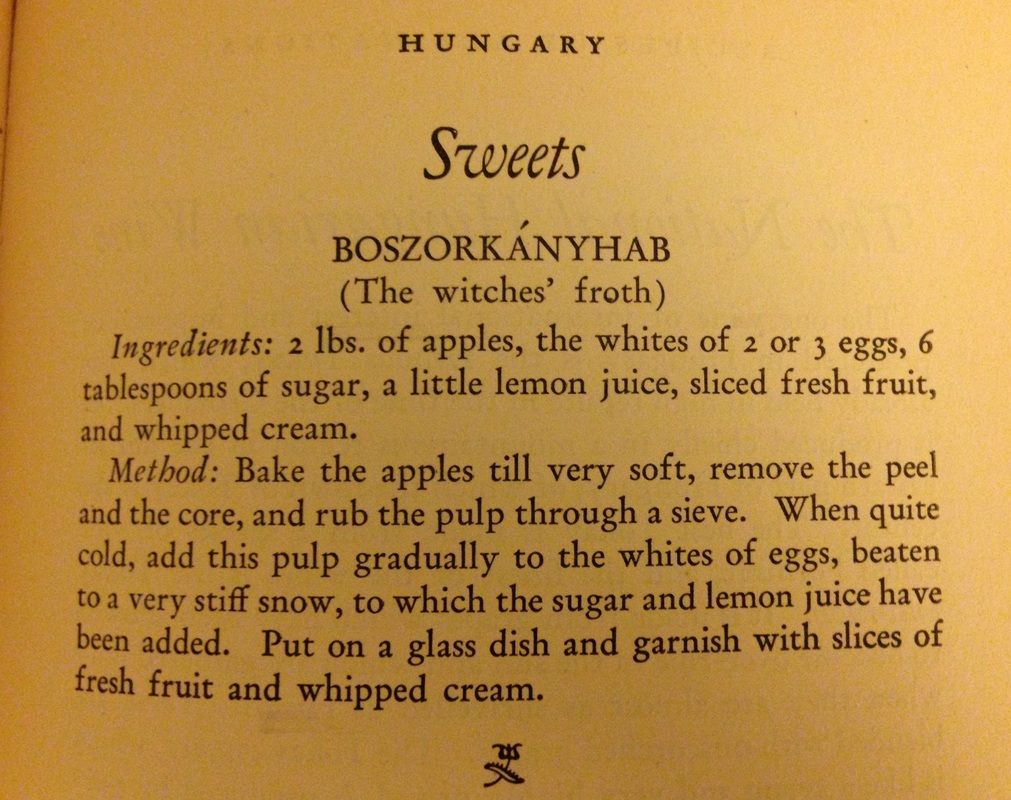
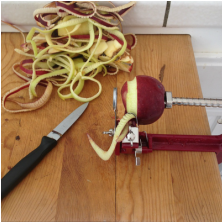
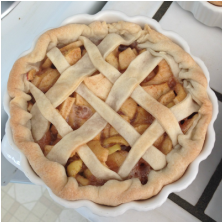
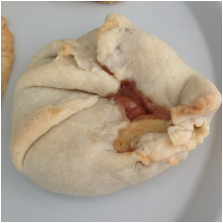
I question the wisdom of posting about apple pie when this is my first one. I might be the last woman in America to jump on the apple pie bandwagon, but in case you too are intimidated by recipes calling for vegetable shortening or 40 caramel candies, I've decided to include this. Plus, if I post this there's no way I can lose the recipe and hope exists that I will make it again. I made two little pies 6 inches across, the dumpling-like monster in the picture above, and something that looked like a pop tart. The fake pop tart and the dumpling got the highest marks since there was a better ratio of filling to pie crust according to my home experts. The first discovery was Martha Stewart's recipe for pate brisee. I'm pretty sure I've seen that same recipe since the late 80s when I used to drool over my mother's copy of Martha Stewart's Pies and Tarts, way back when the Martha Stewart empire was still a dream and she was just a perfectionistic caterer with a book deal and an awesome photographer. (At least that's the way I remember it.) The second discovery was that buying an apple peeler/corer/slicer was totally worth it. I'm not sure that I will use it more than once a year, but I am still charmed by the whole idea. If I have to visit another apple orchard this year just to stave off buyer's remorse, then so be it. So first- the recipe for pate brisee. Click and cook. It was perfect- but be prepared with 3(!!) sticks of cold unsalted butter. I made this recipe twice, and it turns out that that last 1/4 cup of flour is important, so follow the directions more carefully than I did. Apple Pie Filling:
This is straight out of the Ball Blue Book of Canning. I planned on doubling and tripling this to freeze for future pies, but ran out of apples. Next time. Ingredients: 6 pounds apples peeled and cut up 2 cups sugar 1/4 cup flour 1-1/2 teaspoon cinnamon 1/4 teaspoon nutmeg 2 Tablespoons lemon juice Directions: Mix together and cook until it thickens. Cool and freeze. |
AuthorI love trying new foods, cooking, and gardening. I hope to share these experiences on this site. Thanks for taking a look! Categories
All
Archives
May 2020
|
 RSS Feed
Photos from Mechanoid Dolly, Mechanoid Dolly, fidber, Ken_Mayer, eflon, Dendroica cerulea, Urban_Integration
