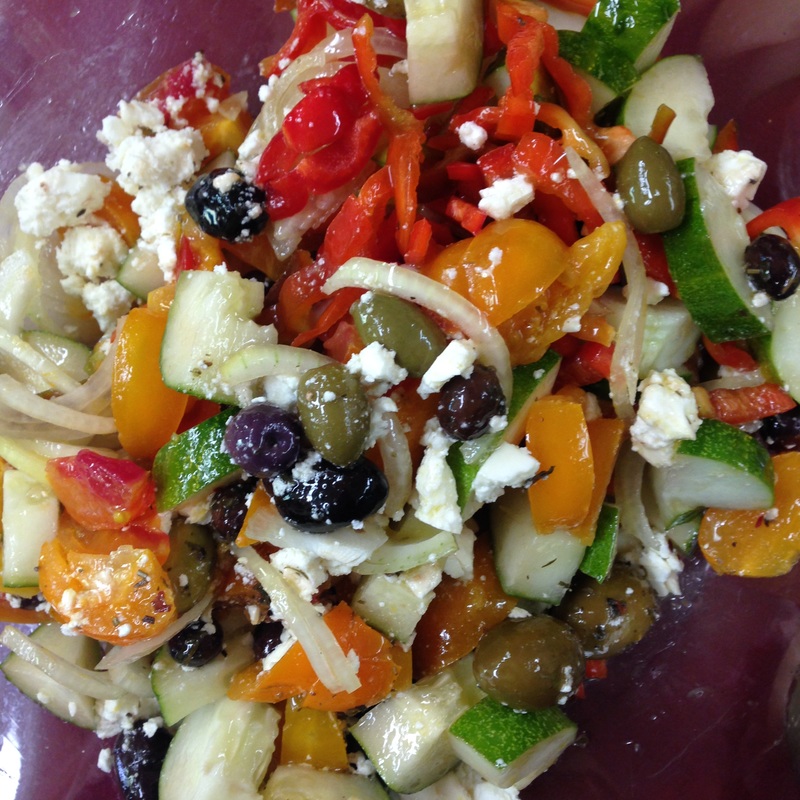
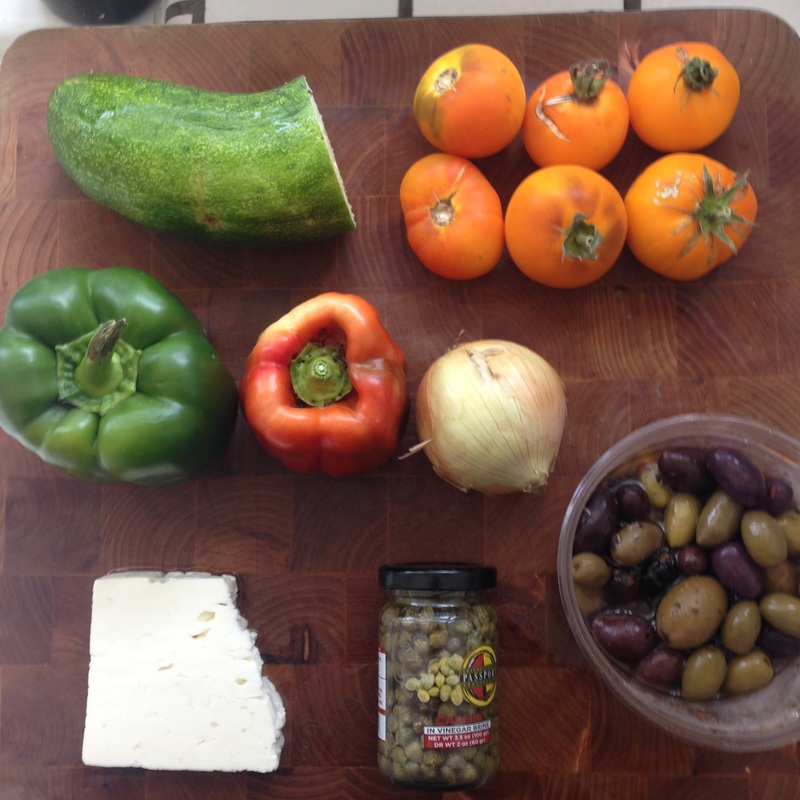
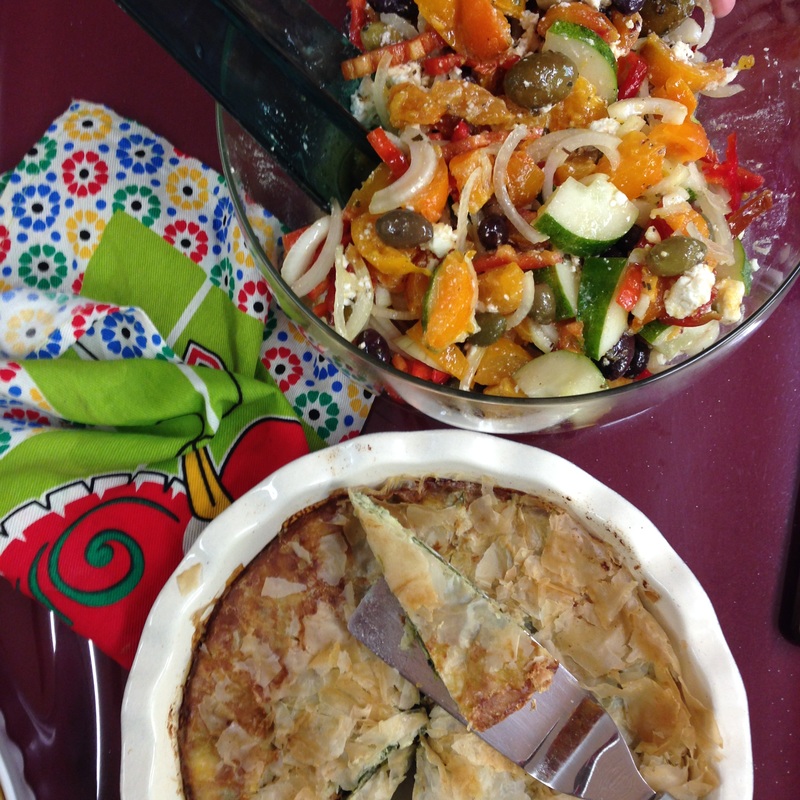
 At least fifteen years ago my grandparents went on an educational cruise through the Greek Isles and asked if I would like a souvenir. Yes! A Greek cookbook, in Greek! They lovingly obliged and returned with two copies of the same book, one printed in English and the other in Greek. Mediterranean food was the rage then, and Italian food was held up as the model of all things healthy, so I was pretty sure I knew what Greek food would be like: light, practically vegetarian, and healthy according to the beliefs of the time. What I saw in this cookbook horrified me. Instead of perusing light, healthy, low-calorie, fat-free, vegetarian recipes containing only a drizzle of olive oil, I found what might, after all, be the real deal. Eggplant fried in copious quantities of olive oil, meats, liver, snails, butter, potatoes, more butter, whole pigs on spits, and béchamel sauce. Ew. Mrs. Seferiadis, a friend and an amazing Greek cook, agreed to teach me the secret to the best Greek cooking. The secret? I don't think she'll mind if I share this- butter. BUTTER!?! We made spanakopita, pastitsio, butter cookies, and baklava, all oozing with butter, and all delicious. Back then the only recipe I could be sure wouldn't kill me and clog my arteries was Village Salad, and I made it regularly. So here it is. Ingredients: 3 firm tomatoes 1 cucumber 1 red onion 2 green peppers, peeled of most of their skin and seeded 1 cup of black olives 6 oz. feta cheese 1 tablespoon of capers 1/2 cup extra virgin olive oil 1/4 cup red wine vinegar oregano, salt, and pepper Directions: Cut the tomatoes and cucumbers into slices and the onion and the peppers into rings. Put it in a bowl and sprinkle with salt, pepper, oregano, and olives. Cut the feta cheese into chunks and add to the other ingredients. Pour the olive oil and vinegar over the salad. Toss. Eat. Enjoy.
2 Comments
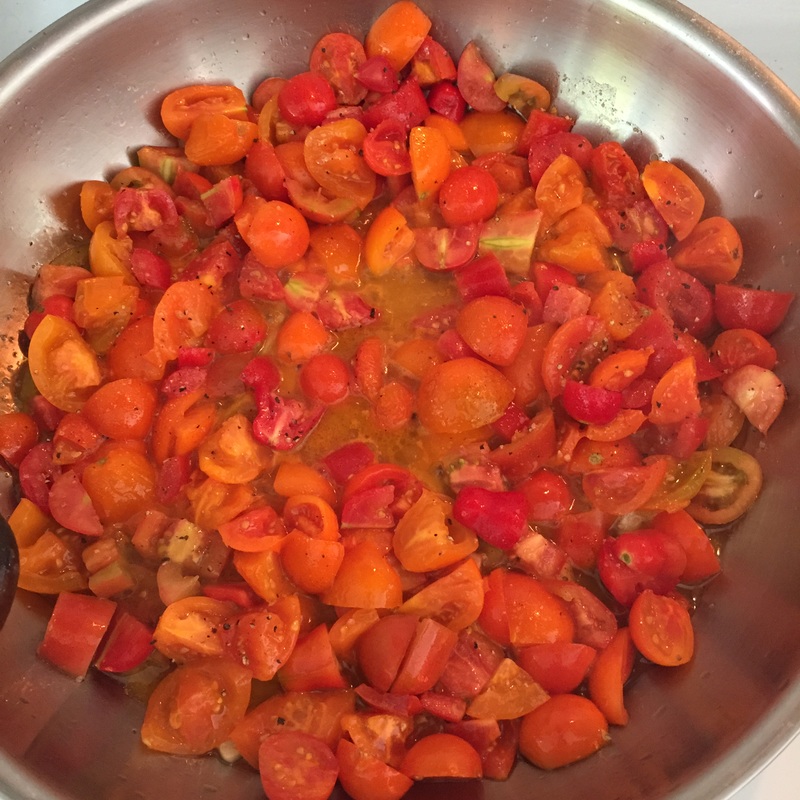
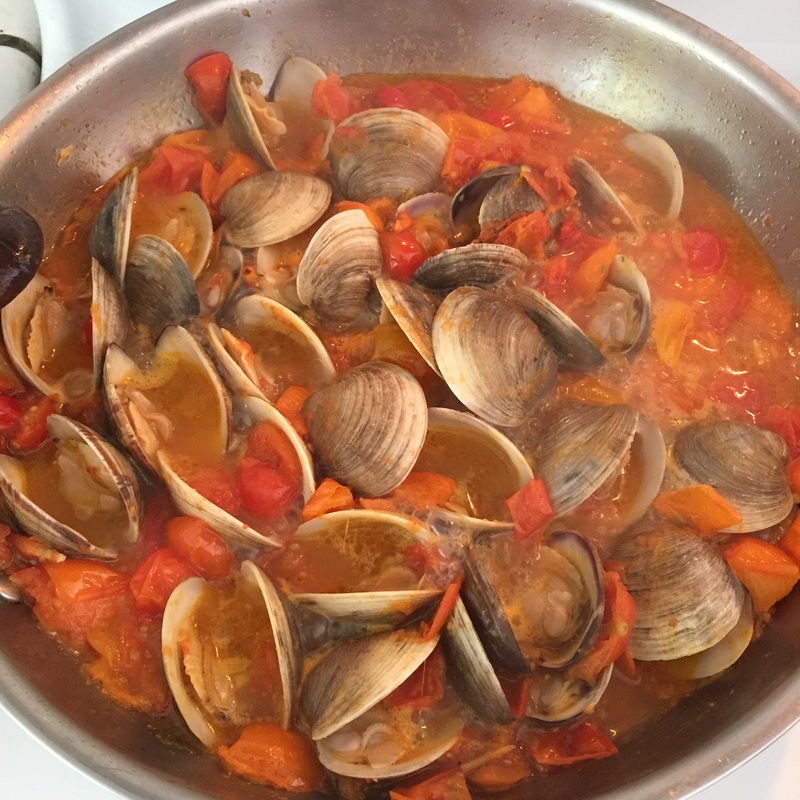
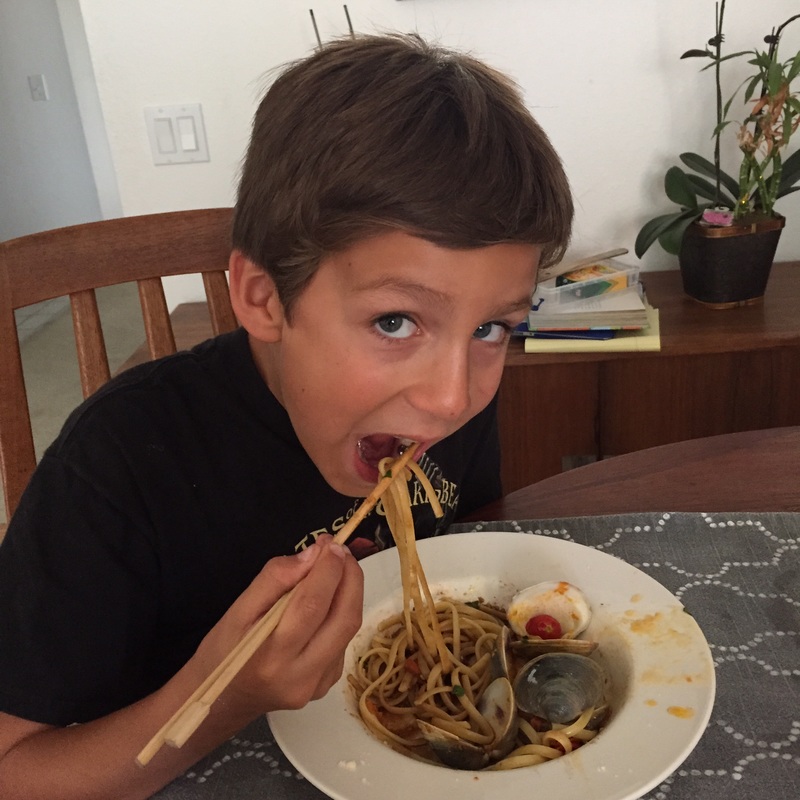
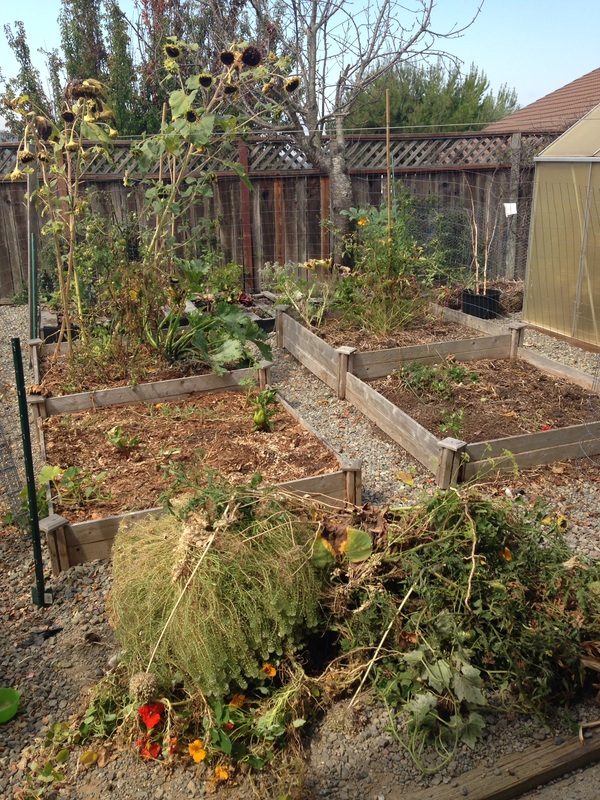 My once verdant, lush garden oasis is now mostly dead. I trimmed away all of the dead leaves and was left with such a pathetic sight that I ripped everything out. Sadly, this didn't improve the view much, but it did leave me with some garlic, lots of green onions, and a heartrending collection of giant green tomatoes. I was a little sad- sad enough that I really wanted to crawl back into bed at nine in the morning. I settled for a second cup of coffee instead.  On the bright side, all the horrible molding overgrown monster plants had to go. It was for their own good, and they're in a better place now. I discovered some surprise beets, and the yellow tomatoes in the picture above were perfectly ripe. I can reach all three living plants to water them now, and some tiny little sunflowers that never got enough water to thrive have bloomed, even if they are only a quarter of their natural height.  I still had enough tomatoes left over to make the salad below. So beautiful! Tomatoes are worth it. I was almost ready to give up on tomatoes. 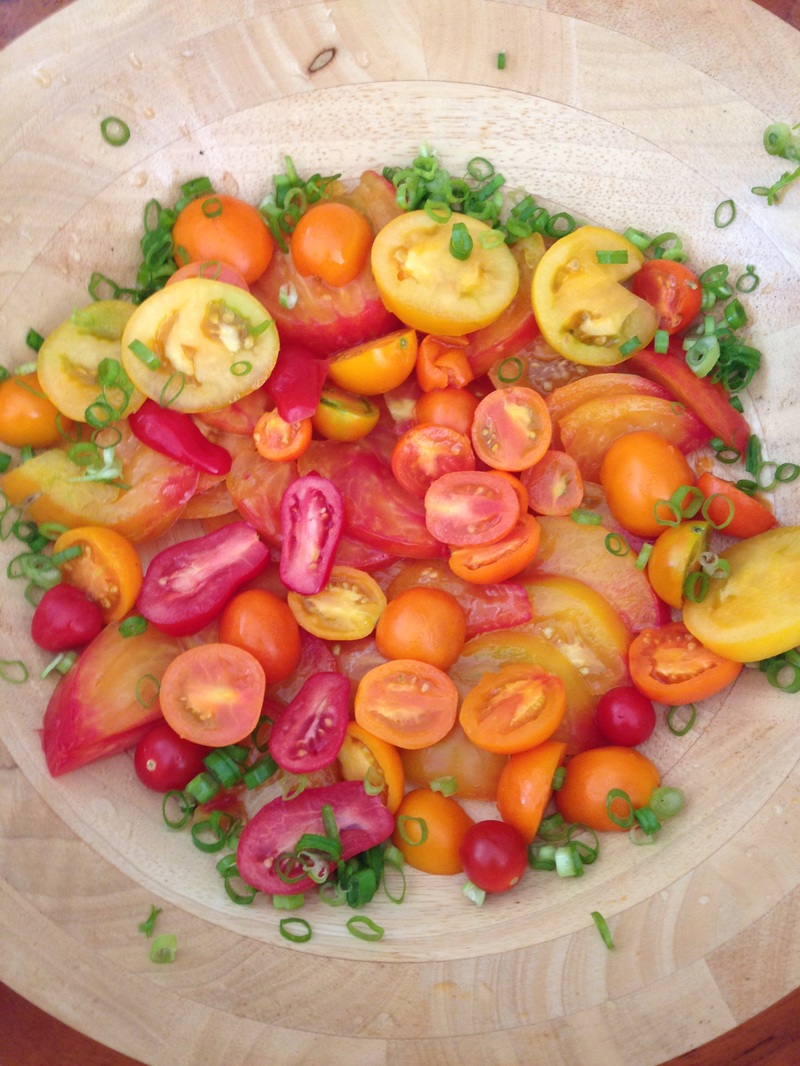 I also cut back the gross stuff in the green house, but I left the roots and I'm feeding and watering them just in case they decide to make a comeback. It's still possible that they're only mostly dead. Maybe next month I'll be singing about rising up from the ashes and other optimistic, inspiring topics.  And finally, the picture below is proof that I have hope at least. Where there are seeds, water and light, a garden may once again flourish if I don't manage to kill it first. 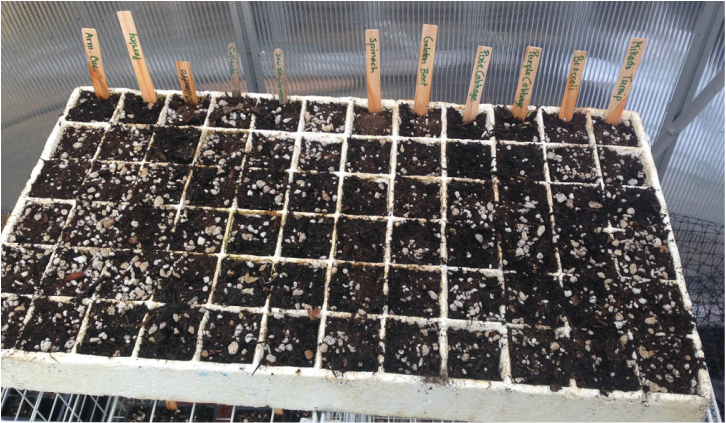 Here's a quote from my sister-in-law, and it was encouraging enough that I thought I would share it here in case you too are suffering from depression-inducing garden setbacks. "I planted cat nip and lavender. If you can find one or both at an herb festival, buy them. They never die. You don't even have to do anything. They survive no water, too much water, drought, floods...name it. They make you feel like a pro. So when little black bugs eat your eggplant, you just look over at the cat nip and be like, "yep, nailed that one!"  My son begs me for this every time we pass the seafood counter. It's quick, and provided you like clams, it's also delicious. I try to make this the same day I buy the clams. Depending on who I buy clams from and how they wrap them up, sometimes I think they get too warm or asphyxiate, so now I bring them home right away, open the packaging, and put them on ice. The pan you cook these in must have a tight fitting lid or you run the risk of torturing your clams instead of just cooking them. If my directions make this sound a little laborious, rest assured this is fast. It just takes a while to write about. :) Ingredients: 1 pound dried linguine 3 tablespoons olive oil 2-4 cups chopped tomatoes 2 cloves chopped garlic 1/4 cup sake or white wine 2 pounds fresh clams rinsed and strained salt and pepper chopped parsley optional: grated parmesan cheese
Directions: Heat a big pot of salted water and bring it to a boil. If you aren't sure how much salt to add, just taste the water to see if it tastes good. While you are waiting for the water to boil, heat a 14" sauté pan over medium high heat. Add the olive oil and chopped garlic, and when the garlic starts to sizzle, add in the tomatoes and salt them right away. (I think three large tomatoes would be perfect, but I try to use up whatever I have on hand since I'm collecting tomatoes from the garden every day right now and I don't want them to go bad. It only makes the sauce drier or juicier.) Let them cook long enough that they start to break down, and then add the sake. Bring it back up to a boil, and then grab your strainer of clams. If any of the clams haven't closed when you rinsed them off, this means they are already dead, so throw them out. Pour the rest into your pan, cover it immediately, and turn the heat up to high. (Don't do that if the sauce looks a little dry, but I always crank up the heat and hope for a quick death.) Give it a few minutes, and then you can start checking to see if all of your clams have opened. When they are wide open they are done. If any of the clams don't open after all the others have, throw them out. Taste the sauce for salt and pepper. At this point the sauce is done, and you can turn the heat down to the lowest setting. When your salted pasta water has come to a boil, add the linguine and cook it until it's almost done. Strain it and add it to your sauce to finish cooking and absorb some of the liquid from the sauce. Top it with a healthy sprinkle of chopped parsley and grated parmesan if you like. On a recent cooking show binge I discovered that Italian seafood pasta is never EVER combined with cheese, but... I like cheese and I am far from Italy. The Italians will never know.
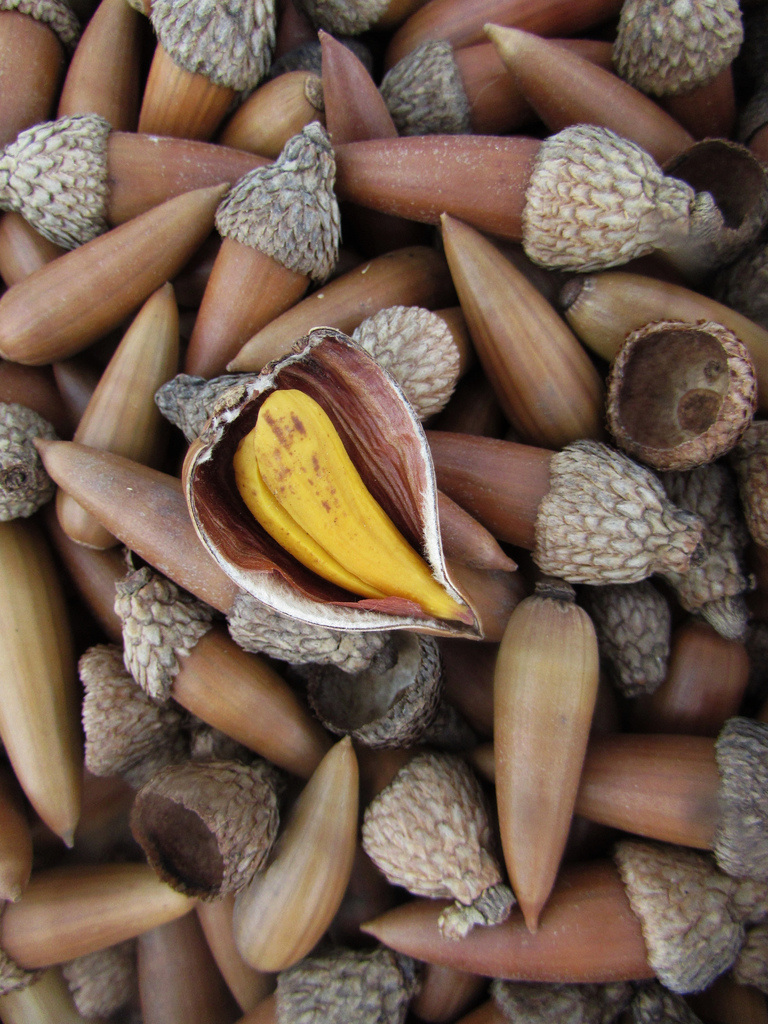
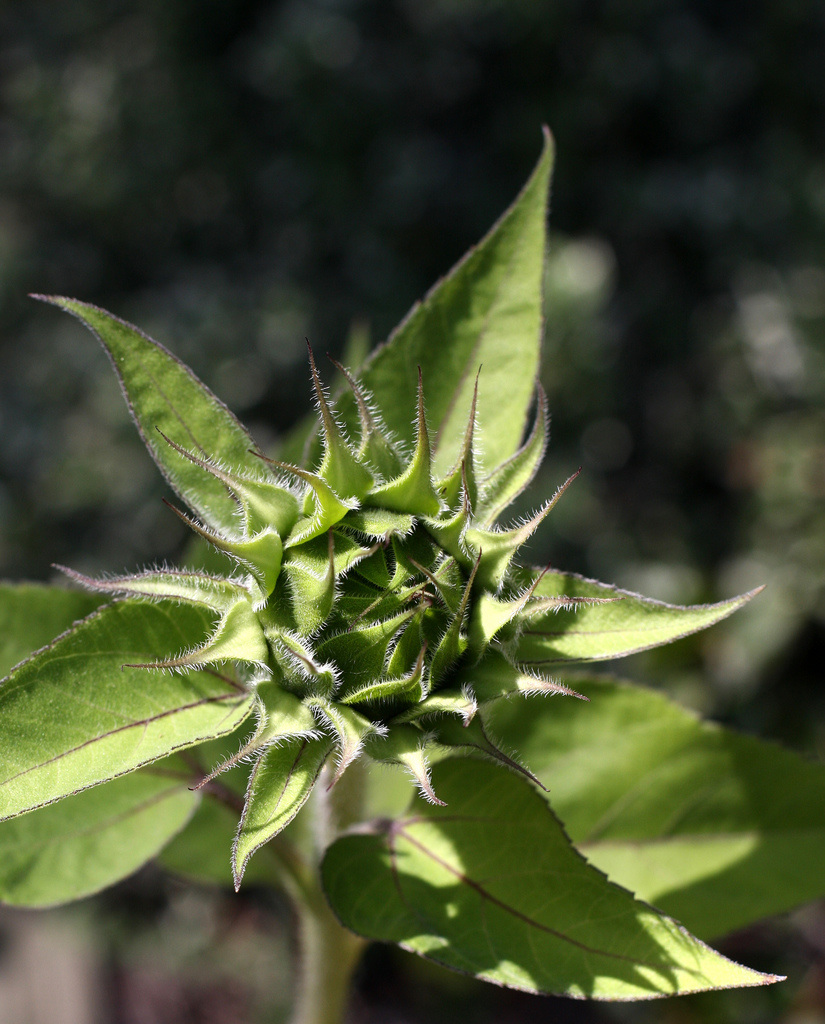
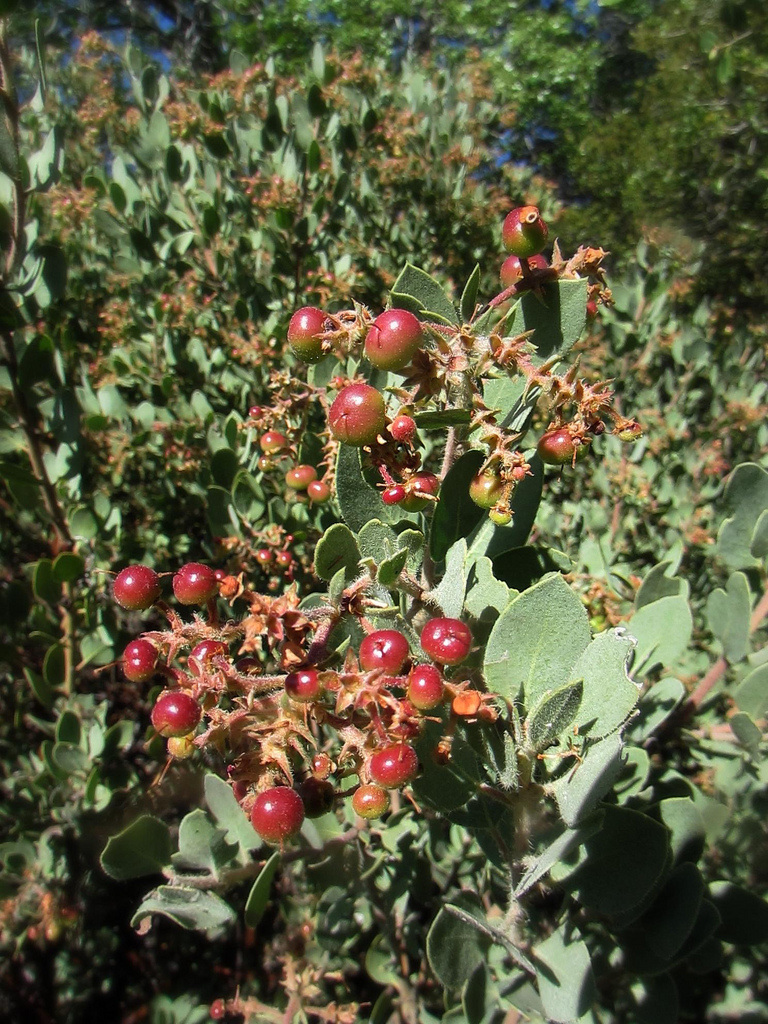
 It was roughly eight years ago that I lay awake at night listening to the arrhythmic beat of falling acorns against the back deck of the house. It was that time of year again, and a real mess to sweep up every day along with the oak leaves and massive spider webs. I had been struggling with a tiny little garden of potted plants along the side of the house (which I killed every single year) and wishing I could grow more of my own food when I remembered a fourth grade field trip. It was there that I first learned that acorns are not only edible, but were once a staple in the diet of the people who lived in California. The guide had asked for volunteers to guess how acorns were prepared, and my hand shot up. Here's what I remember: you have to grind up the acorns and then strain them repeatedly with water until the bitter tannins leach out. With all the excitement about eating locally and growing your own food, it seemed like I'd be a step ahead if I could just cook and eat what actually grows naturally. It's one shade classier than dumpster diving, and it doesn't even require much preparedness on my part, just a willingness to eat. I did some research back then, or at least a google search, but couldn't find much information on how to feed my family an acorn-based diet. Another dream dead, but hold your tears... Last June I found the answer to my dilemma on a visit to the nature center at Big Tree in Calaveras County, home to the famous jumping frog contest. There I discovered a book, Living Wild: Gardening, Cooking and Healing with Native Plants of California by Alicia Funk and Karin Kaufman. Wow. I'm obsessed, and you will be too. There are lots of acorn recipes, though the authors seem to prefer the term "oak nut". This threw me off initially, but I'm pretty sure an oak nut by any other name is really an acorn. Acorn muffins, acorn flatbread, and three different methods to leach out the bitter tannins. But enough about acorns, because apparently those bounce on the deck in the fall. In summer you can enjoy recipes like manzanita berry muffins, wild lilac tea, and elderberry soda. There are recipes for cattail hearts, bay leaves and bay tree nuts, both of which also once littered my deck. Unfortunately, I've moved now and have a garden instead of a deck covered in delectable native edibles. Timing is rarely perfect in life. The second book in my post zombie-apocalypse arsenal is an old copy of The Joy of Cooking. You may have one too on a dusty shelf in your garage, and if you have the opportunity, take a look at the chapter on wild game. It's wonderful and terrible. Don't believe me? Take a look below at what I believe is the 1964 edition. It's killer. I find the gloves and lace-up boots particularly gruesome. 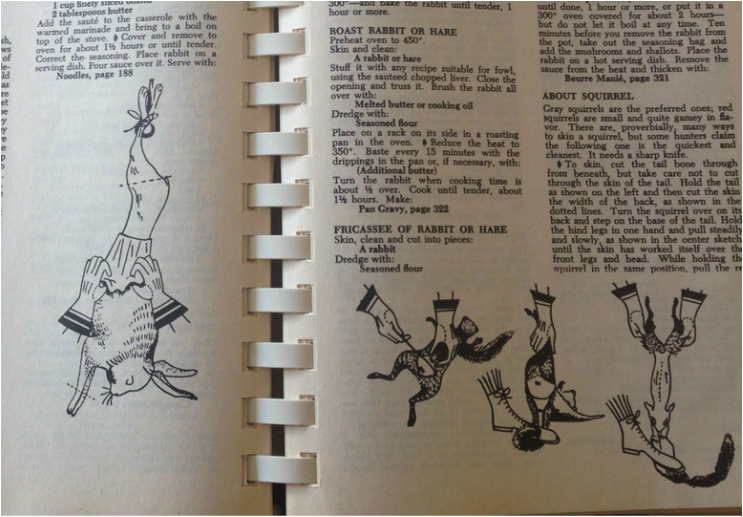 every rodent's nightmare I haven't tried any of the recipes yet. YET. But one day I'll get around to it, and hopefully before we find out that zombies are real and the government has been struggling unsuccessfully to keep them quarantined. Someday while other people are out thieving and experimenting with cannibalism, I will be enjoying cattail heart soup, sunflower buds, oak nut flatbread, and roast squirrel under a canopy of the stars. Armed with whatever you use to fend off zombies of course.
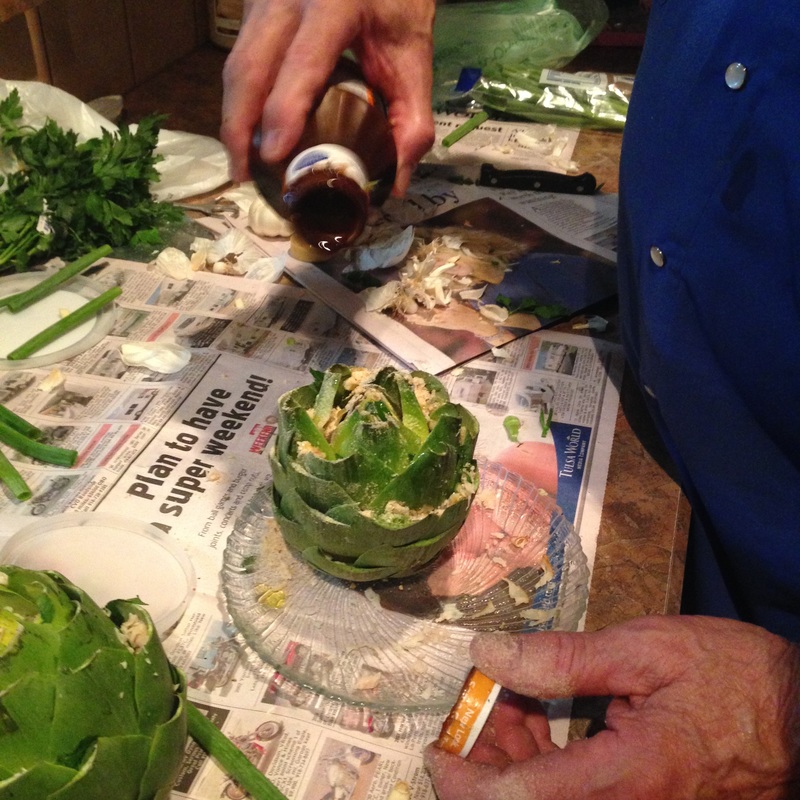
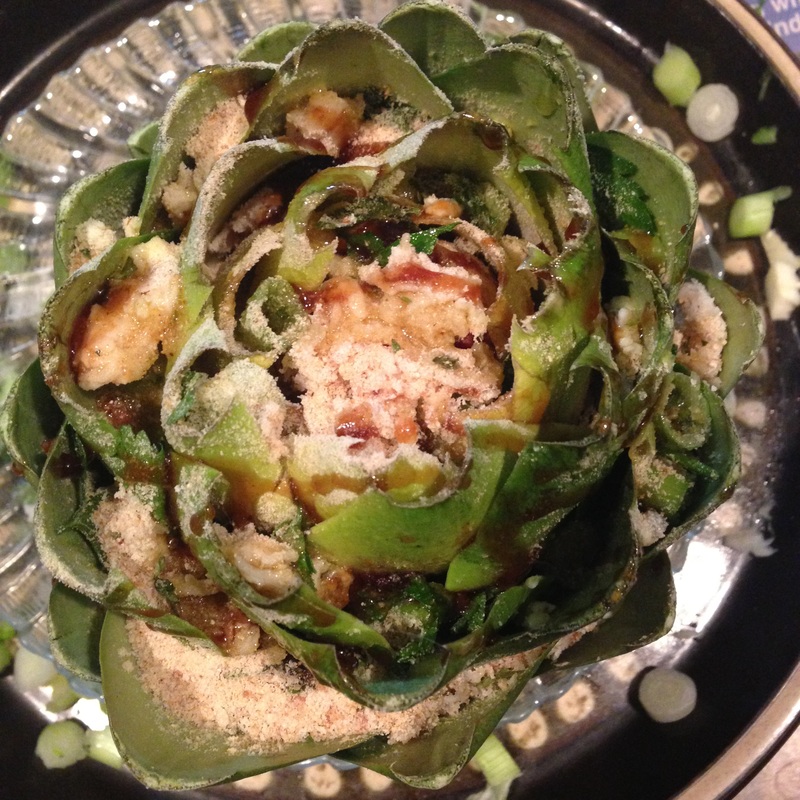
 I've always loved artichokes, and I've always enjoyed them the easy way: steamed and then dipped in aioli. Maybe twice have I bothered to snip off all the little thorns and clean out the center choke before cooking them. It's nice, sure, but hardly worth the effort. I highly recommend that you try artichokes the lazy way at least once. This way of preparing artichokes was more work, but the results were so beautiful that I think it's worth the effort. My father-in-law made these for dinner one night, and halfway through watching him make these I realized this would be either disgusting or brilliant. I wisely started taking pictures just in case. This is a variation on what I think is a classic artichoke recipe, but it takes a huge creative risk and throws in a bizarre assortment of things I promise you never before associated with an artichoke. The results were wonderful. Whether or not I follow this recipe closely, once I saw this done I realized the possibilities and now lie awake nights dreaming up what bizarre combination I will try that will make me rich and famous. I will not include amounts since all you do is sprinkle a little of each filling in. I had never had this and I stuffed these with the help of a small child; I don't think you can mess this up. The original version had just slivers of garlic and parmesan in it, so if the lunch meat sounds too over the top, you can always try it that way. However, having that little bit of meat in it made it feel like a more complete meal. (As I type this, my husband is telling me how disgusting this sounds. Rest assured, it was really good.) I might try this with leftover ham soon. Ingredients: artichokes chopped garlic parmesan, either grated or chopped shredded turkey lunch meat (!) chopped parsley chopped green onion bread crumbs olive oil garlic flavored hoisin sauce (!!) Directions: If you've never cleaned an artichoke before, you begin by taking a pair of scissors and cutting off the thorns. When you get to the thin "petals" toward the center, do your best to cut the thorns off and then clean out the fuzzy part by scraping it out with a spoon. Artichokes begin to oxidize right away, so a lot of people throw them into a bowl of cold water with lemon juice added, but the oxidation doesn't affect the flavor so it's up to you. The stems can be eaten too after you peel off the tough outer stem.
Open the petals up a little. One at a time, sprinkle in first the garlic, then the parmesan, the turkey, parsley and green onion. Sprinkle the bread crumbs over the top, then add a drizzle of olive oil, and then a drizzle of the garlic flavored hoisin.
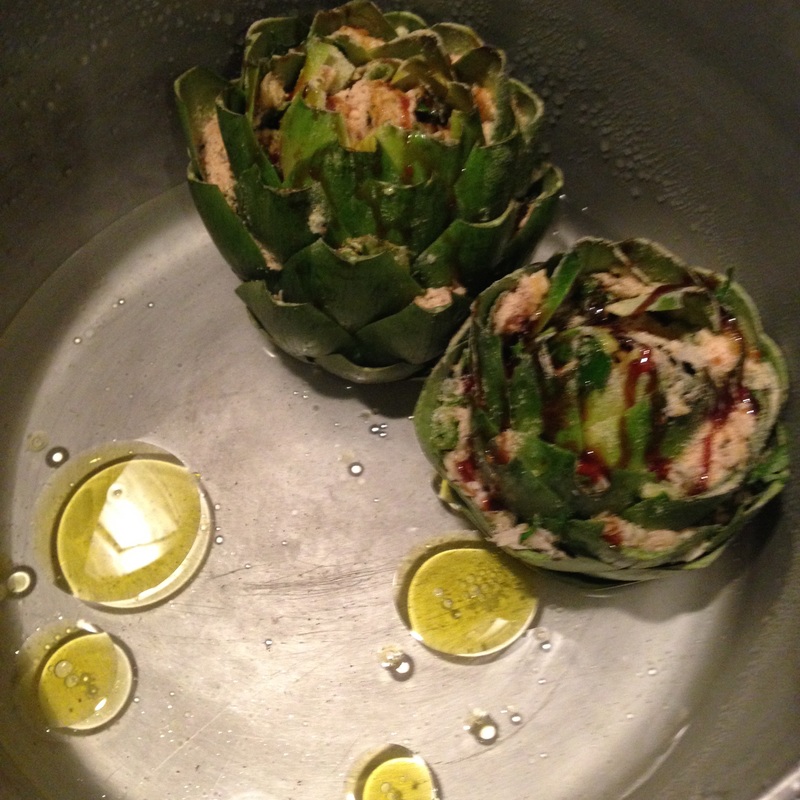
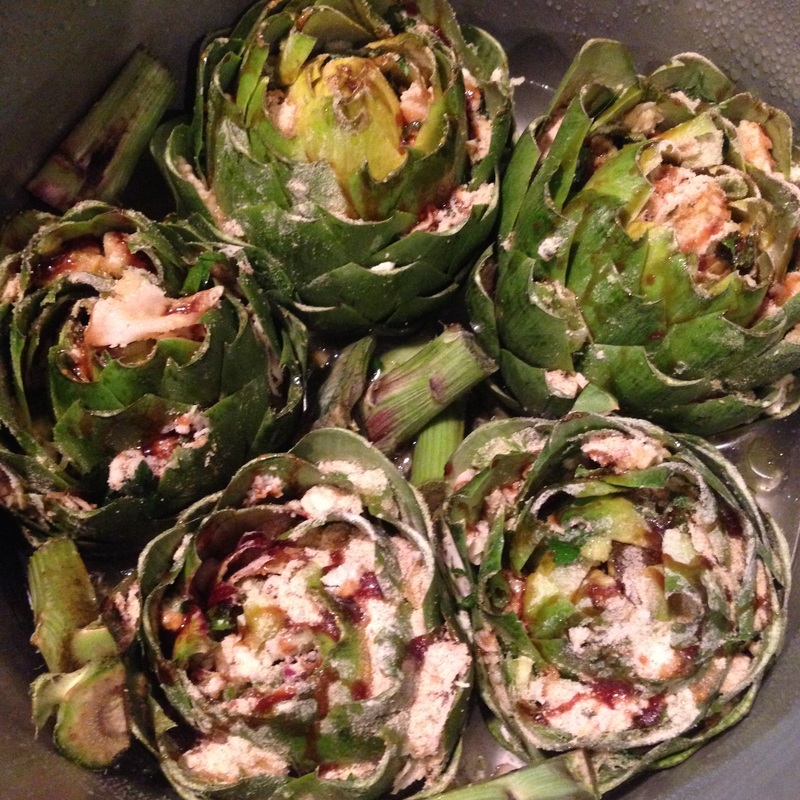
Drizzle some olive oil in a pot and put the artichokes and their stems in. Add about an inch of water and bring it to a boil. Turn the heat down to let the water simmer, cover the pot, and wait. The artichokes are done when the outer leaves can be pulled off easily. Usually the artichoke holds its shape, but the one in the picture below didn't and it was DELICIOUS. 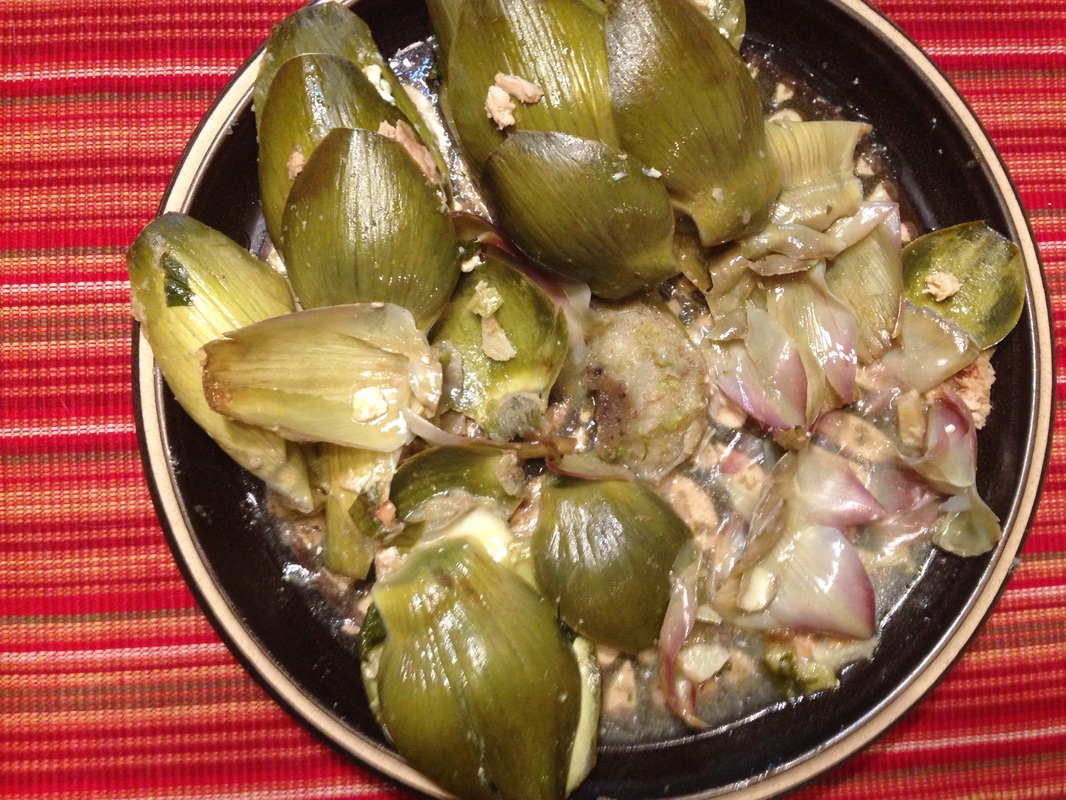 And if you would like to try the traditional version, here is a note from my mother-in-law, on how to prepare traditional Sicilian artichokes that my husband grew up with- also excellent. I prepare them the same way, but I only use garlic slivers, parmesan cheese slivers around the leaves and salt/pepper and parsley on top. In the pot I add water to half way up the artichoke and steam them for 45m to 1 hour. I found to only use male artichokes with the pointy leaves. They are tastier. Don't know why. :)
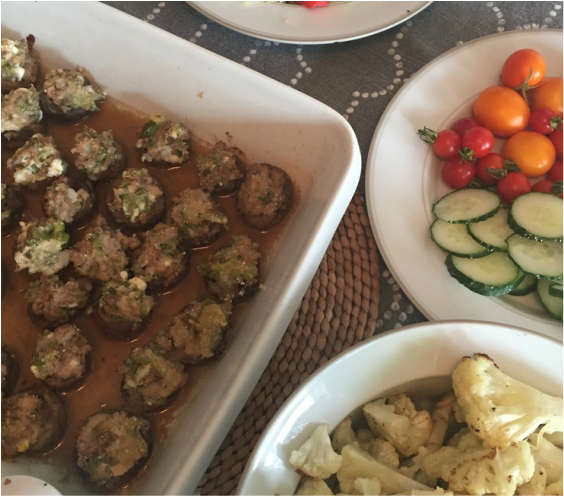
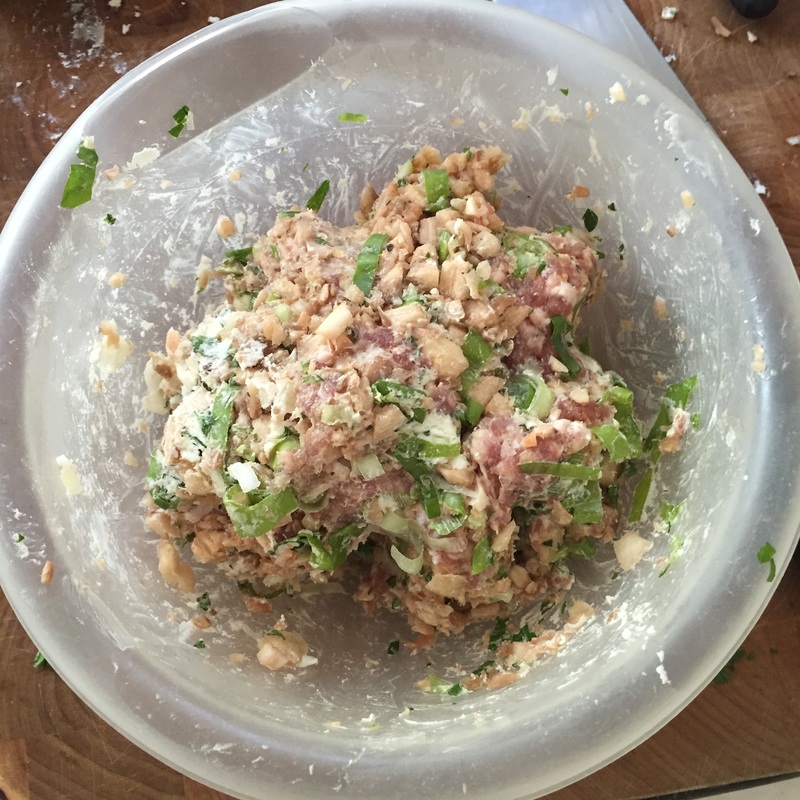
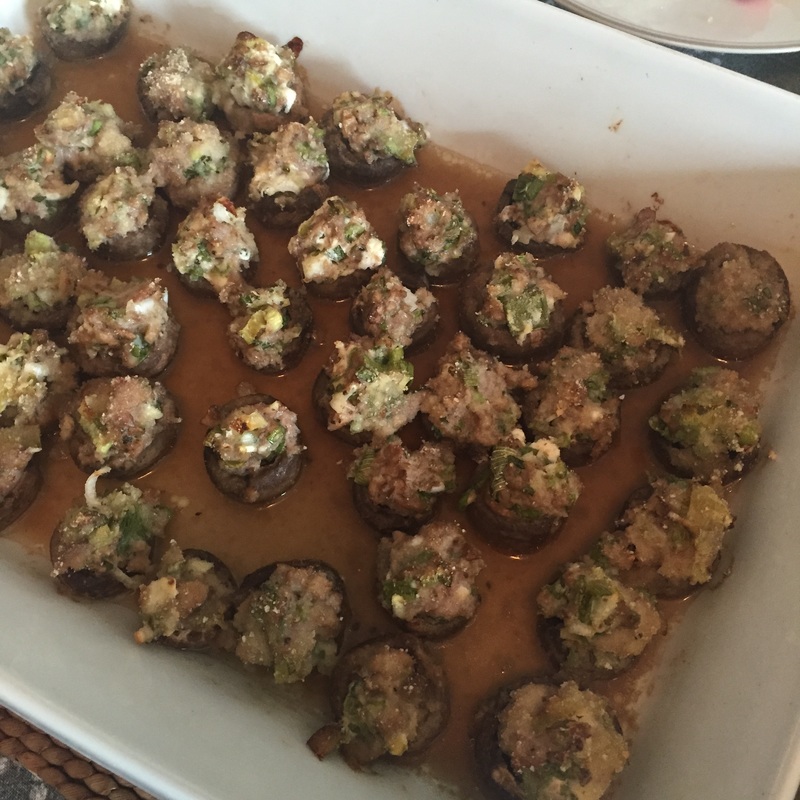
My stuffed mushroom kick ended long ago, but I've decided it's time to bring them back. With bread and a salad it makes a nice light meal, potentially the kind of meal where you don't suffer any guilt later for raiding the ice cream stash after the kids go to bed. I used to make a vegetarian version, but I think this is better. I don't bother measuring anything, since the main idea is to make sure there's enough salt and that it isn't dry. It's also wise to chop everything up very small. Apart from that, you can't go wrong. Most people use good sized mushrooms for this, but I had little ones and it was fine. Use what you have. Ingredients: mushrooms (I had a bag the size of a cantaloupe) olive oil half pound mild Italian sausage garlic parsley green onion parmesan salt and pepper bread crumbs
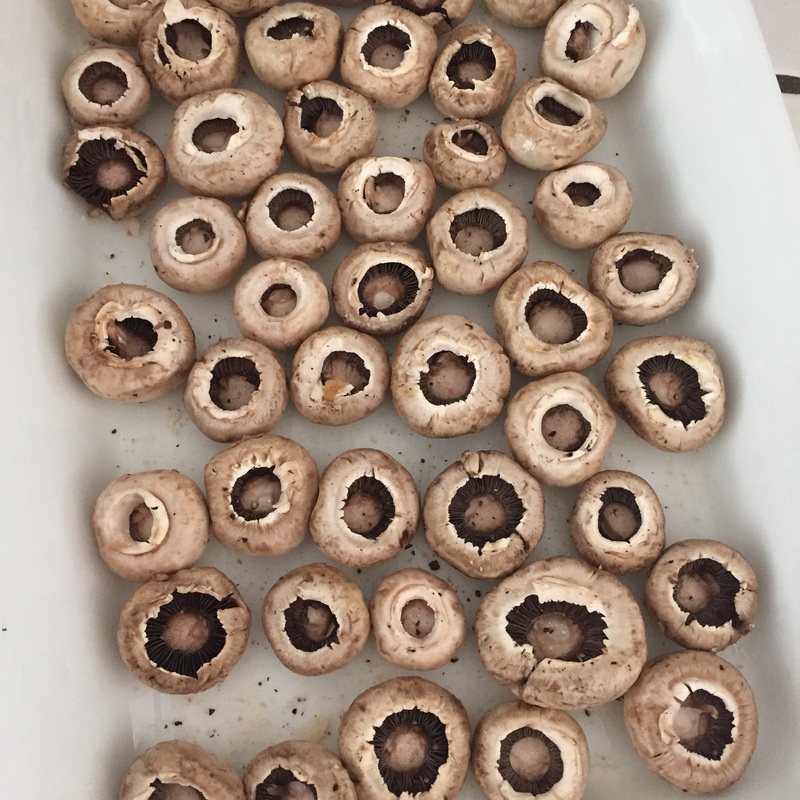
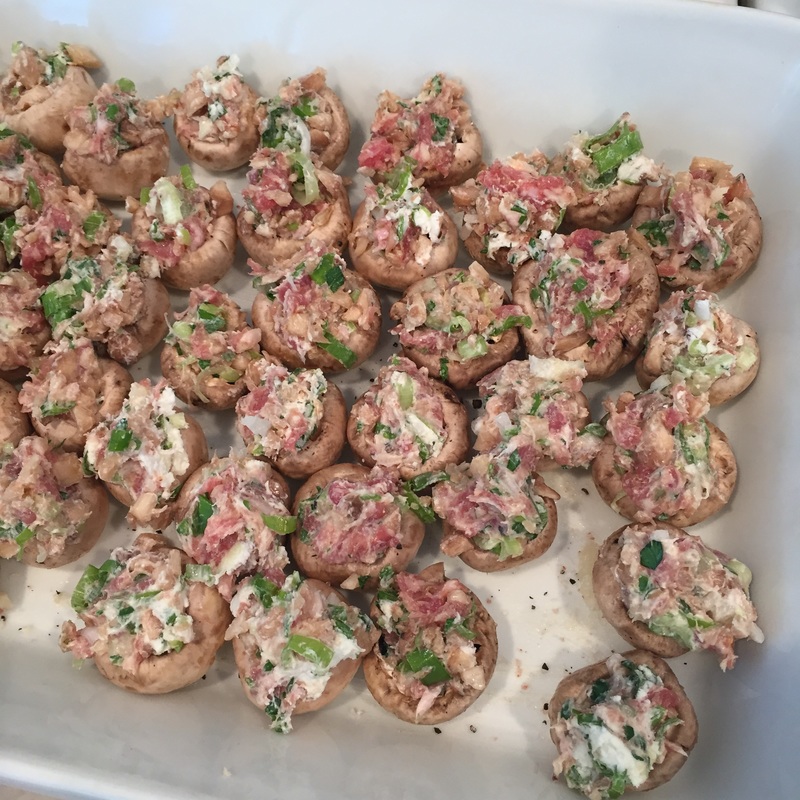
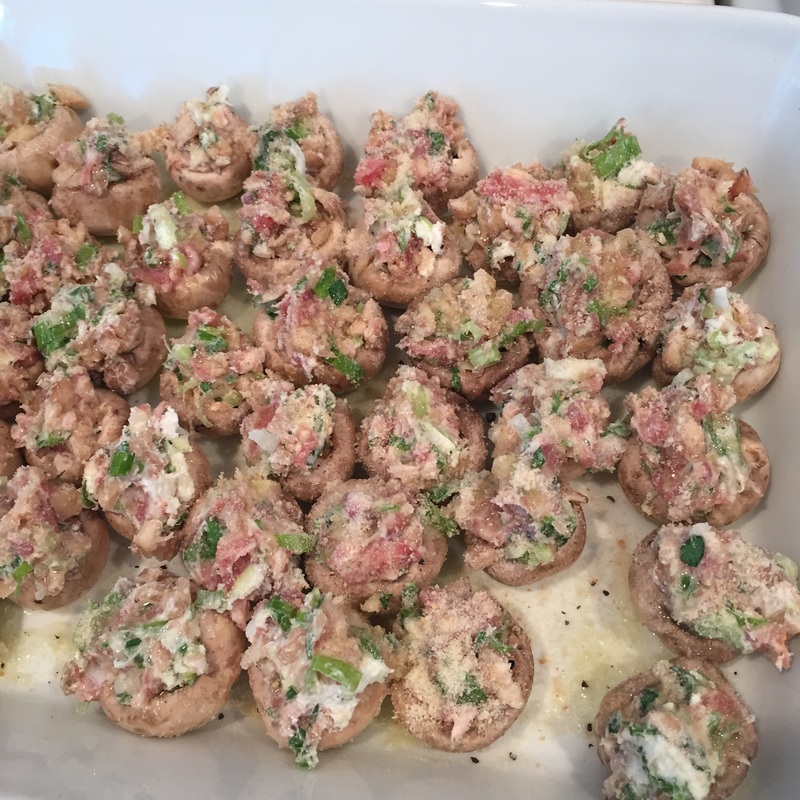
Directions: Mushrooms can be pretty dirty, but under no circumstances will I be pressured into individually brushing them off. I put them into a strainer and hose them down briefly with the spray attachment in my sink. Shake them as best you can to dry them. Pull out the mushroom stems and chop them finely. Put them in a bowl and add the sausage, chopped garlic, chopped green onion, chopped parsley, grated parmesan cheese, and salt and pepper. Mix it up very thoroughly, probably the best way also being the messiest- with your hands. If you have no idea at all how much salt to add and you are expecting guests, you can fry a little spoonful and taste it that way. Oil a baking dish and lay the mushroom tops down in it. They should be dry by now. Season them with just a little salt and pepper. Into each mushroom place a little ball of the meat filling. Sprinkle bread crumbs over the top and then drizzle each one with a little olive oil. Bake them in a 400 degree oven until the mushrooms look well cooked and the tops are browned. They should not be at all raw. If your mushrooms are big, you might want to cook these at a lower temperature like 350 to make sure the whole mushroom cooks before the tops burn. That's it. You're done!
|
AuthorI love trying new foods, cooking, and gardening. I hope to share these experiences on this site. Thanks for taking a look! Categories
All
Archives
May 2020
|


 RSS Feed
Photos from Mechanoid Dolly, Mechanoid Dolly, fidber, Ken_Mayer, eflon, Dendroica cerulea, Urban_Integration
