 Every time I make this someone asks me for the recipe. It comes from The Complete America's Test Kitchen TV Show Cookbook, the careful product of ten years of overthought and over-testing. Reading the collection in one sitting isn't recommended. Every single recipe starts with a complaint that goes something like this: "Restaurant [insert food] is frequently bland, greasy, and flavorless. Homemade versions are worse. The outside is burnt, and the inside is a mushy disaster. We set out to develop a version that would be perfect in every way to all tastes and be ready in under thirty minutes..." However, every single recipe I've tried from them has been good. Maybe even great, as long as you don't care about authenticity. They definitely got it right this time. The pasta isn't too garlicky, it stays green, and the day it is made it is so good it's hard to share it. It's still great the next day, but not as good cold out of the refrigerator, so let it warm up. I doubled the recipe in the picture above, and it made A LOT of pasta salad. There are a million possible variations: add olives, substitute sun dried tomatoes, fold in baby spinach leaves. Just don't mess with the sauce. 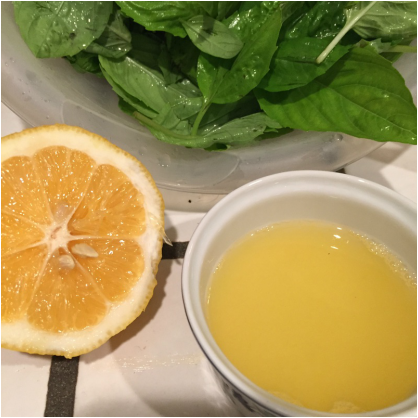 Ingredients: 2 garlic cloves 1 pound bow tie pasta or penne 1/4 cup olive oil plus a little more to toss with the pasta 3 cups packed basil leaves (about 4 ounces) 1 cup packed baby spinach (shocker, I know- that's why it stays green) 2 tablespoons of lemon juice salt and pepper 1/4 cup toasted pine nuts, plus more to toss into the salad if you like 3/4 cup grated parmesan cheese 6 tablespoons mayonnaise (mayo? really? but it's good) 2 cups halved cherry tomatoes Directions: 1. Heat up a large pot of boiling water. Salt it until it tastes pleasantly salty. Drop the garlic cloves in for one minute, and then take them out with a slotted spoon and set them aside. Add the pasta to the boiling water, stir it, and cook it until, according to the editors, it is "just past al dente." RESERVE 1/4 CUP OF THE COOKING WATER. Drain the pasta, toss it in a bowl with a little olive oil so it does't stick together, and then spread it out on a baking sheet to cool for at least thirty minutes. 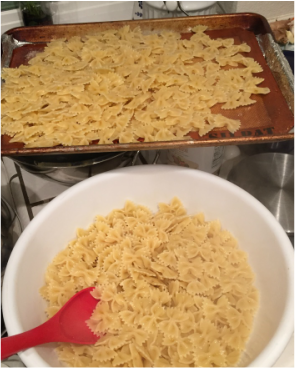 2. Throw the garlic cloves into a running processor, and check to be sure you have no big clumps of garlic left. Add the basil, spinach, pine nuts, lemon juice, 1/4 cup of olive oil, 1 teaspoon of salt, and pepper to taste. Blend it until it's smooth. Add the Parmesan and mayonnaise and process it until it's well mixed. Pour it into a big serving bowl. 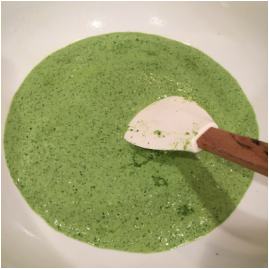 Toss the pasta with the pesto, and add some of the reserved pasta water a little at a time until the sauce perfectly coats the pasta. Add in the tomatoes and any extra pine nuts you would like to. 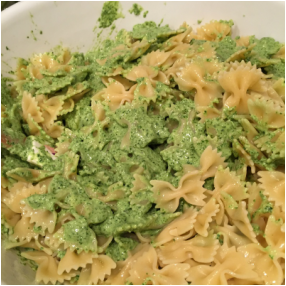 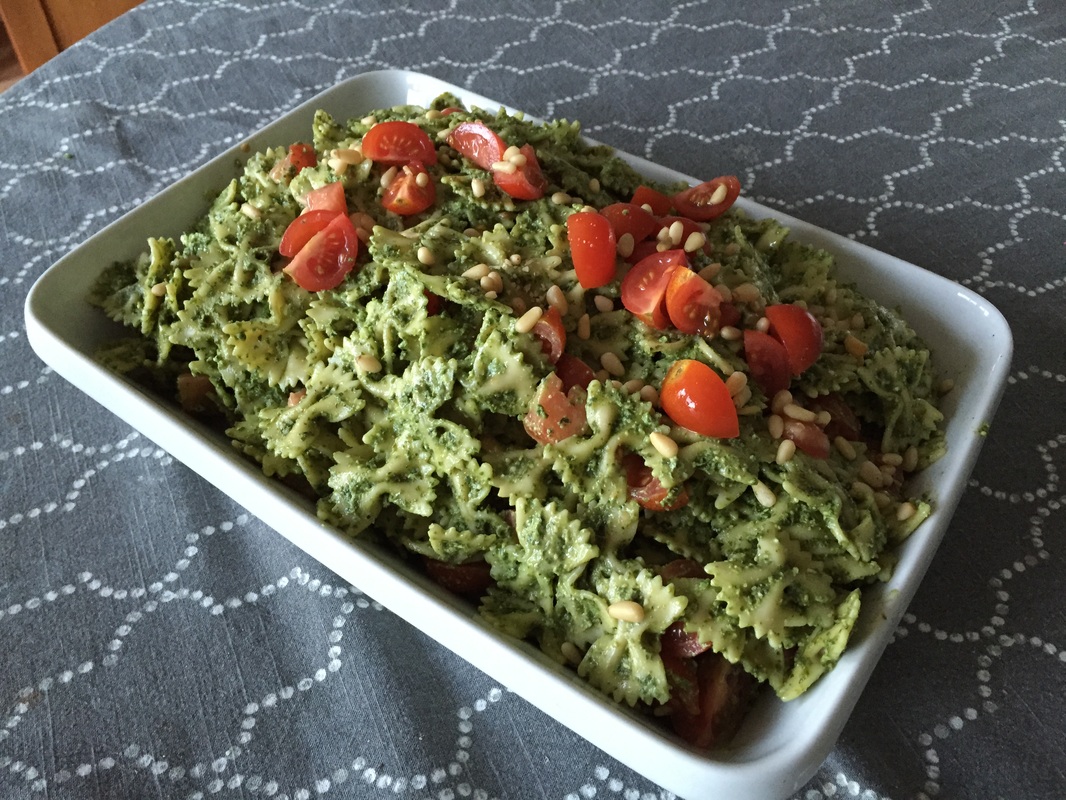 Finished product.  A similar salad sold for $14 a pound at a winery in Napa. Buy the wine, bring the pasta. 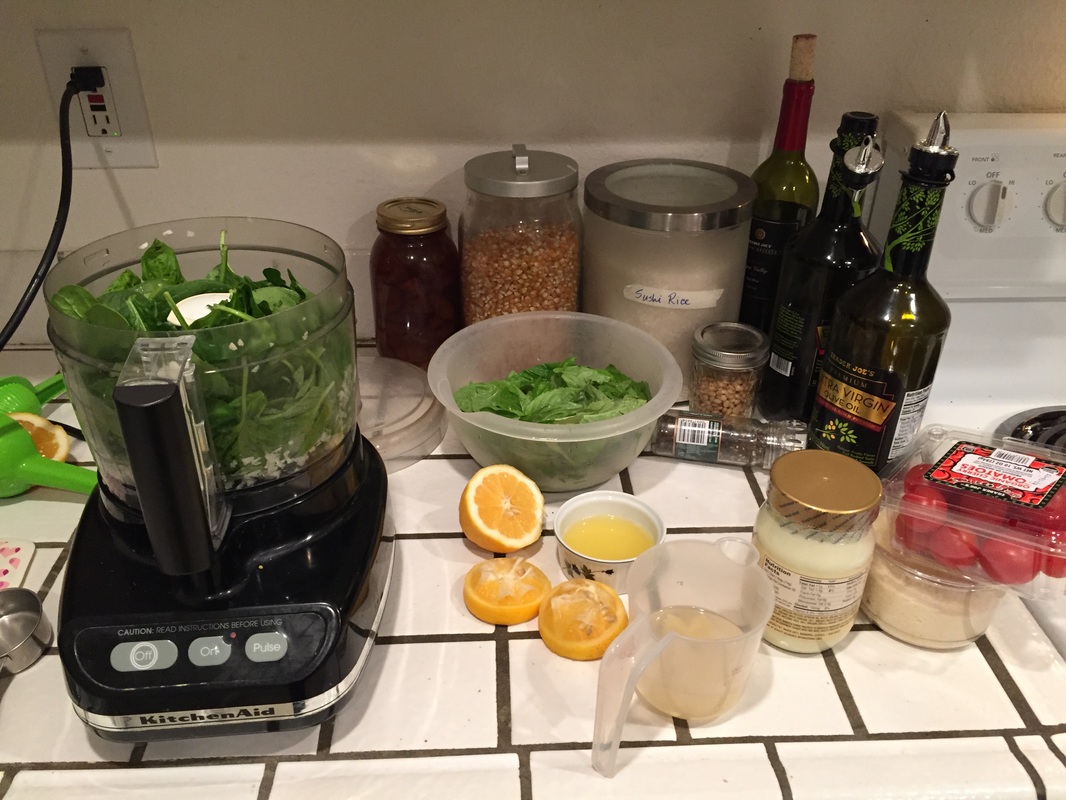 The cost in kitchen mess.
2 Comments
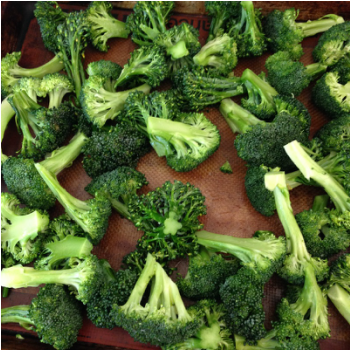
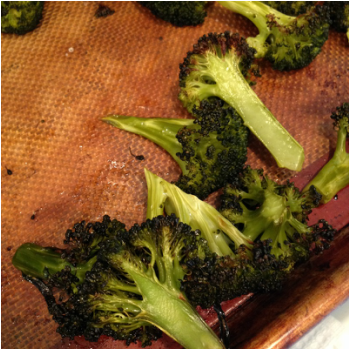
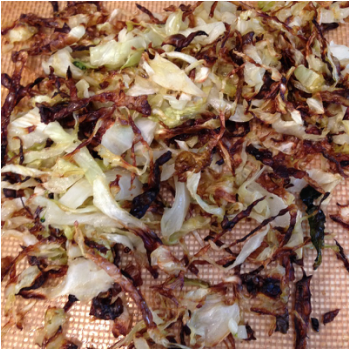
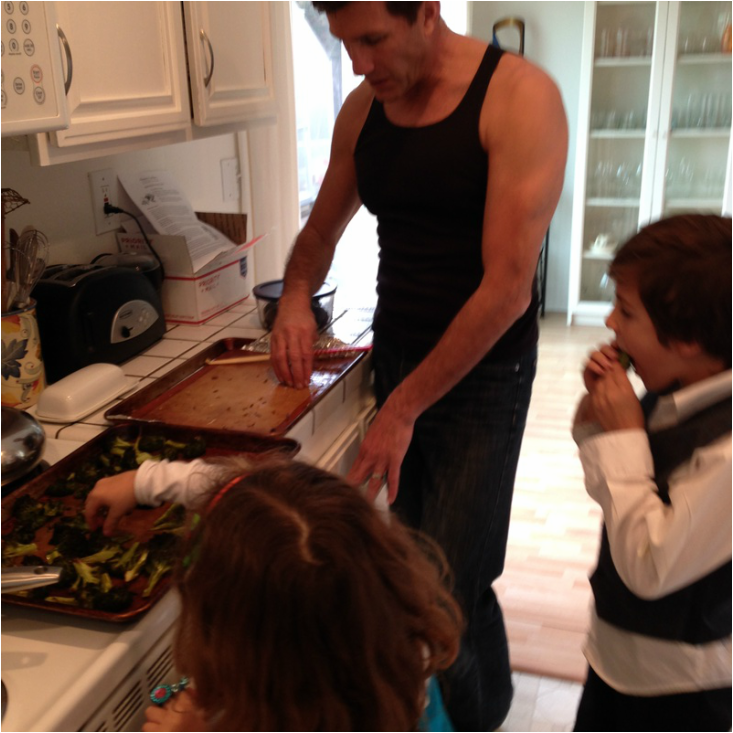
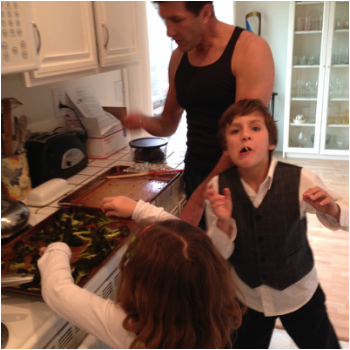
Sure, eat your vegetables-but roast them first. I wanted to post about salads made from roasted vegetables or a mix of raw and roasted vegetables, but my family ate it all before I could do it. This isn't the first time this has happened. I hear people complaining regularly about needing to eat more vegetables, and this is a great way to do that- and way more fun than another arugula salad. Even if all you have lying around are some old carrots, potatoes, and onions, you will learn to love them again if you roast them. As you can see in the pictures above, I sometimes burn whatever I forgot about in the oven. I am notorious for my astounding inability to multitask, and burnt vegetables are the result. Call me crazy, but they still taste good. The proof is in the pictures below, where everyone appeared in the kitchen and started mainlining broccoli and semi-burnt cabbage. No vegetables left behind.
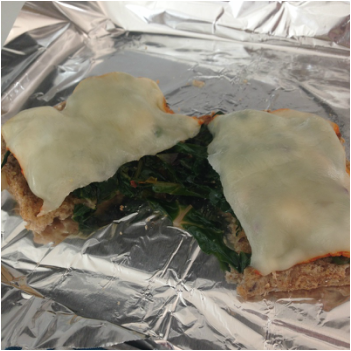
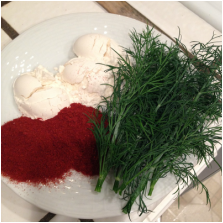
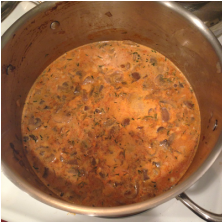
I LOVE roasted cauliflower, turnips, eggplant (peeled and cubed first), fennel, leeks, and tomatoes. Carrots are great with a little curry powder. Potatoes go without saying. Asparagus I drown in olive oil, salt, and minced garlic and they taste like garlic fries. Ingredients: vegetables olive oil, melted butter, or reserved bacon fat salt (unless you are using bacon fat which is already really salty) optional: curry powder, loads of minced garlic Directions: Preheat your oven to 425 degrees. Cut your vegetables up however you like them. Toss them in a bowl with olive oil or melted fat, and sprinkle in some salt. Spread the vegetables out on a cookie sheet, a jelly roll pan, or a roasting dish, and put them in the oven. If you're roasting more than one vegetable and they are similar in size and consistency, you can roast them together, but for a pair like broccoli and cabbage you are better off roasting them on separate pans. If the pieces are pretty big you will have to turn down the oven temperature to around 375 so that the vegetables can cook through before the outside burns.  Roasted cauliflower on an open face sandwich.  My daughter loves to cut mushrooms with an egg slicer, and she loves to eat them almost as much. It's a win-win. Ingredients: 2 tablespoons olive oil 1-1/2 pounds sliced mushrooms 1 medium onion, diced 3 tablespoons flour 2 tablespoons Hungarian paprika 2 tablespoons dried dill (or fresh dill to taste) 4 cups homemade broth 2 cups milk 1-1/2 pound potatoes, peeled (or not) and diced 1/2 cup sour cream salt and pepper
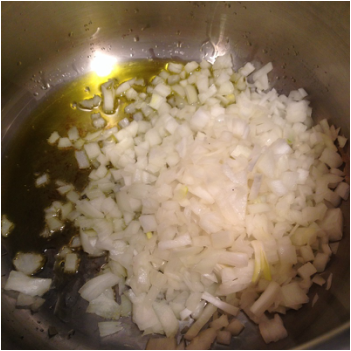
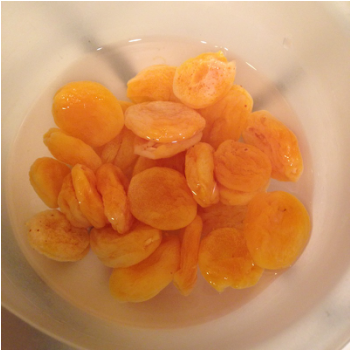
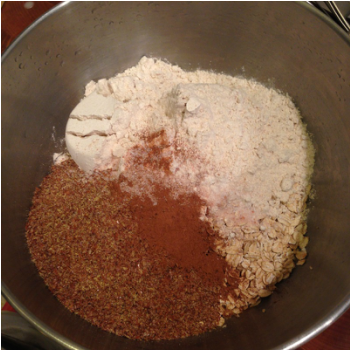
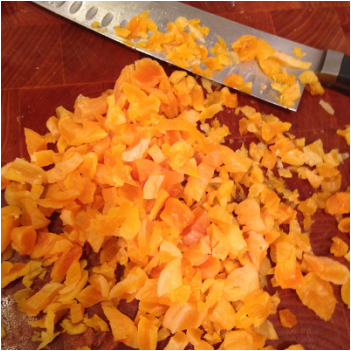
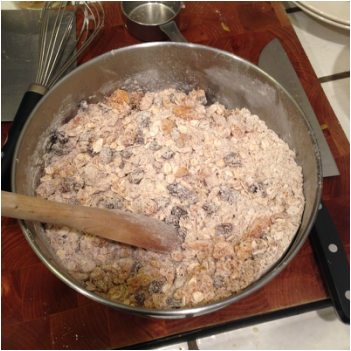
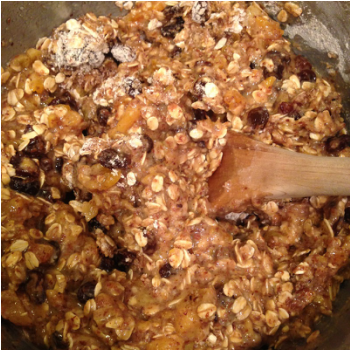
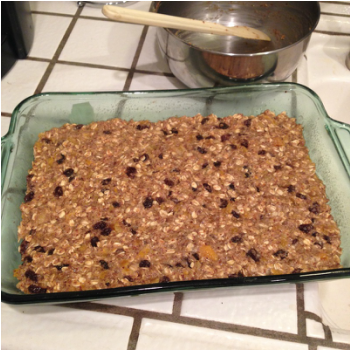
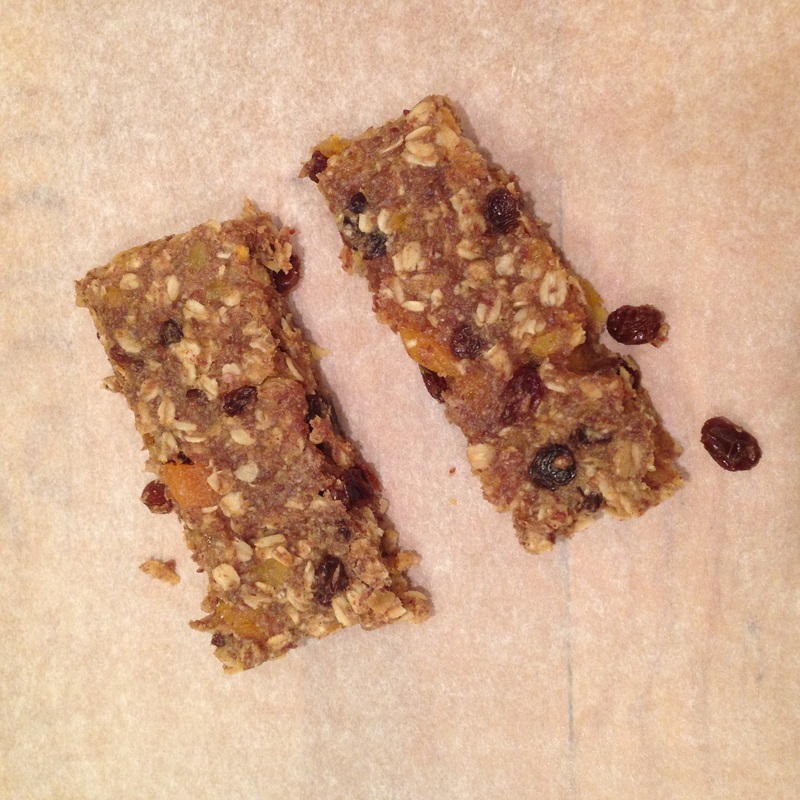
Directions: Heat the oil in a soup pot and add the onions, mushrooms, and some salt. After a few minutes the vegetables will release a lot of liquid. Keep stirring. When most of the moisture has evaporated (10-15 minutes), add the flour, paprika, and dill and stir for a minute. Next add the broth, the milk, and the potatoes. Bring the whole thing to a bubble and let it simmer until the potatoes are cooked through. When the potatoes are tender, take the pot off the heat, stir in the sour cream, and season to taste with salt and pepper. 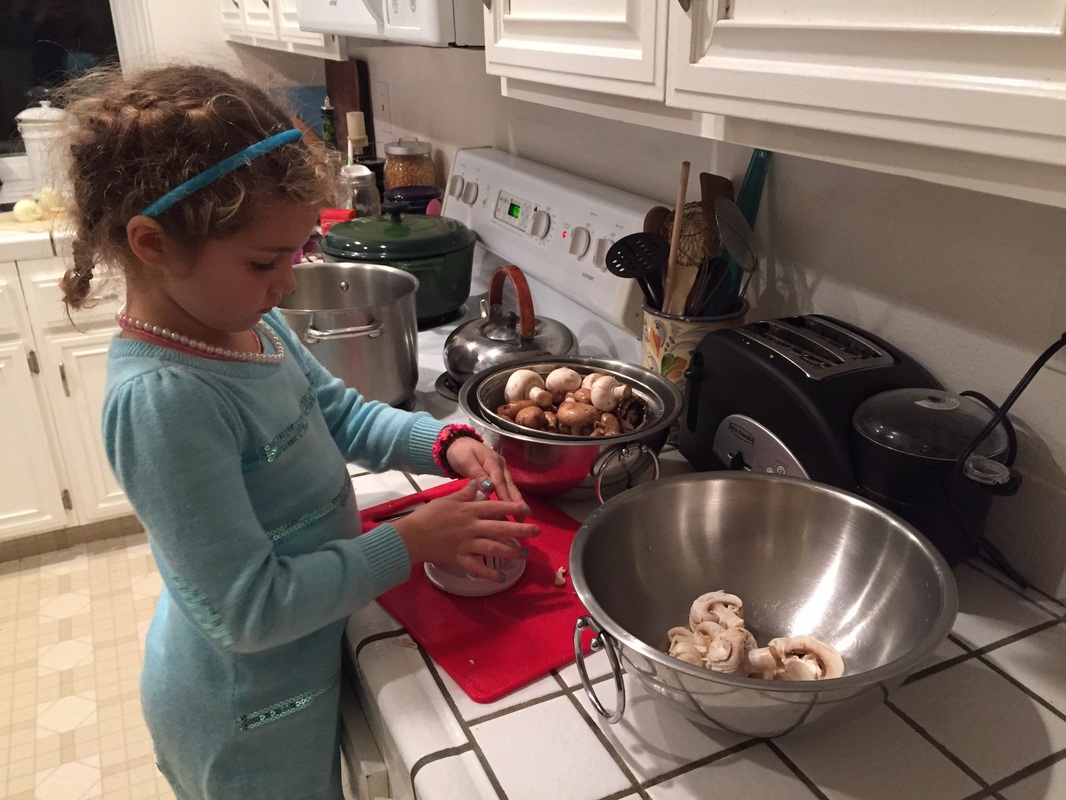 My lovely kitchen helper who helped me make the soup, ate out all the mushrooms in her bowl, and left the rest for me.  It was brought to my attention recently that there is nothing to eat in the house. Whut? I started to get mad, but I decided to make Sunshine Bars instead. The original recipe came from Laurel's Kitchen, the ultimate source of 1970's vegetarian nutritional wisdom. It is full of whole wheat, tempeh-laden, yogurt-y goodness, and it was also one of the cookbooks my mom gave me when I left the house in 1996. She had a preview copy of the twentieth anniversary edition with a note from Laurel herself, and kindly gave it to me. The book warns against the evils of sugar, and rightly so, but there is still a small dessert section at the back with their recipe for Sunshine Bars. These are meant to be a homemade version of "health food bars", but they are much better. Depending on whether my kids go crazy for them or not I will make a double or even triple batch next time and freeze them. There is a lot of stirring and pouring for this one, so next time I'll also let my kids help. Substitute ingredients. As long as you keep the ratio of dry to wet the same, it should turn out fine. Ingredients: 1 cup boiling water 1 cup dried apricots 1/2 cup maple syrup 1/2 cup melted coconut oil 1-1/2 cups rolled oats 1 cup whole wheat pastry flour 1/2 cup flax meal 1 teaspoon cinnamon 1/2 teaspoon salt 1 cup raisins 2/3 cup almond flour
I wrapped mine individually in waxed paper for no particular reason except that it looked cute and reminded me of how my mom used to wrap my dad's lunch sandwiches back in the day. I'm not sure that making these saves any money, but at least you know exactly what you're putting in them. I also didn't calculate how much it cost to make these, but when I turned around and looked at my kitchen I remembered the real cost: clean-up.  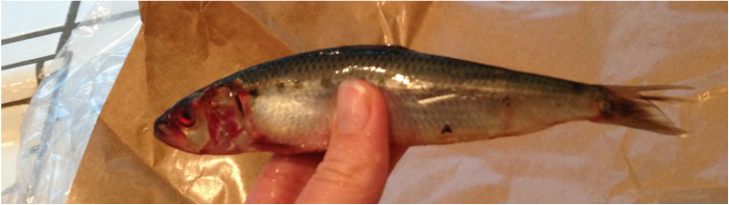 That's why not. They tell us to eat more fish, smaller fish, and oily fish. I believe sardines fit the bill, but no one seems to rave about sardines the way they do about blueberries or kale. Sardines have been on my to-do list, but they look a little scary. I've deep fried smelt before, but those are small enough that I didn't mind ingesting them whole. Unfortunately, sardines are too big for me to get excited about eating them whole, and too small to seem worth the effort. Ask people about sardines and you get the anchovy face, even though not too many people have tried them. However I was looking for cheap seafood, and at $1.99 a pound, it doesn't get cheaper. When I asked for them, the guy behind the counter actually looked a little excited and said, "they're so GOOD for you!" I asked if they came cleaned already and he laughed at me.
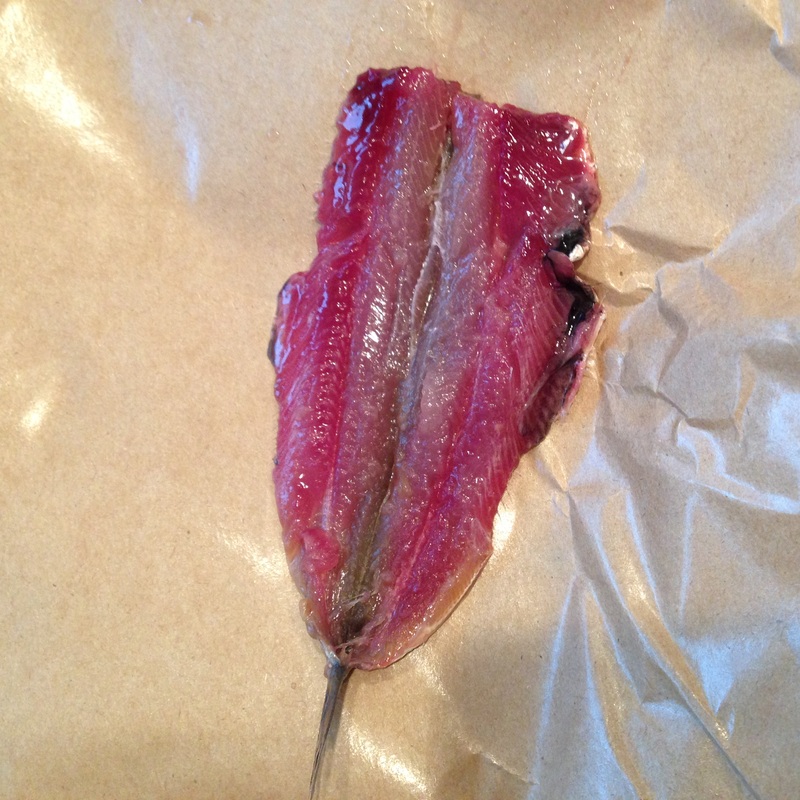
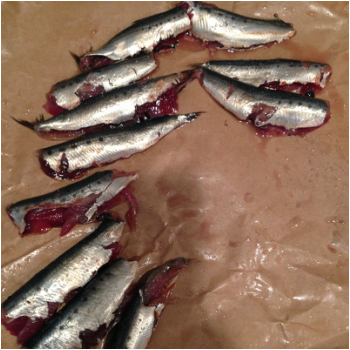
I looked up recipes for sardines, and the few that called for fresh sardines said that cleaning them was a simple matter. De-scale, split open along the belly, rip the head off, and out come the guts and bones. Thankfully, my sardines turned out to have already been scaled. The rest wasn't horrible work, but then I've helped butcher a few chickens in the last few months, and I'm getting a little less squeamish. When buying fish, they always say to look for firm flesh and clear bright eyes. A closer look at my sardines revealed that they must have been doing some hard partying right before they died, because they looked less than fresh. Not a promising beginning.
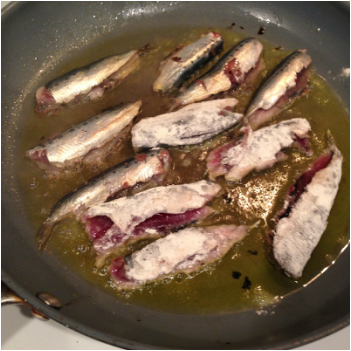
Once I was done cleaning the fish, I salted them, dipped half of them in flour, and pan fried them in a little olive oil. No one else would try it, so it was a lonely meal. But delicious. Next time I will be sure to have a pot of steamed white rice ready and serve it with soy sauce and lemon since that is my favorite way to eat fish. I saved the leftovers with the soy sauce and lemon, and took it out for lunch. After reheating, it was even better than I remembered. I wrapped them up with spicy olives and arugula in a wheat thin since that was what I had on hand, and it was far better than the sum of its parts. Ridiculously good. 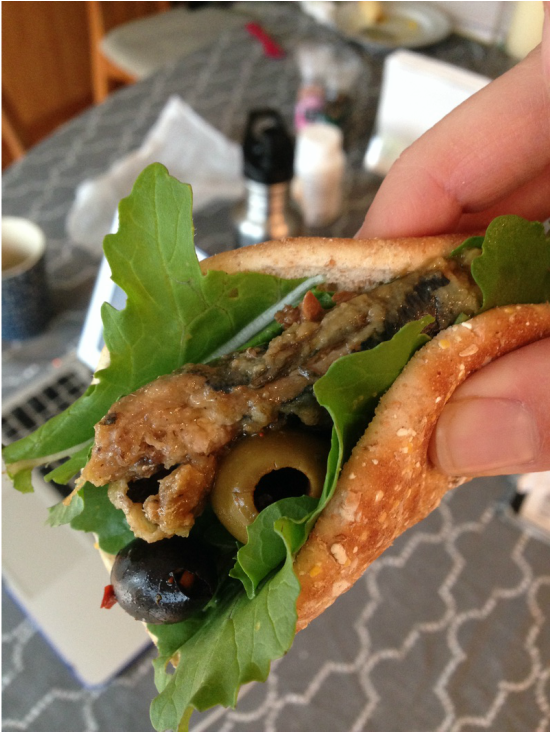 The verdict? Sweet, with all the health benefits of mackerel but none of the aftereffects and cheaper than flavorless farmed tilapia. Yes, I absolutely recommend sardines.
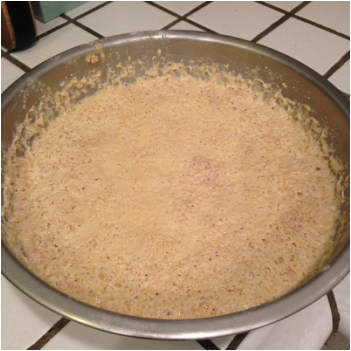
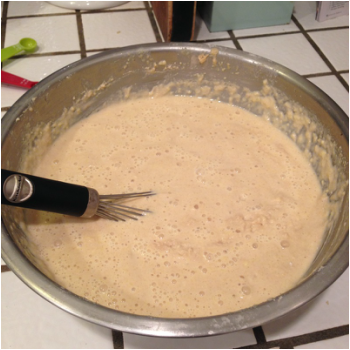
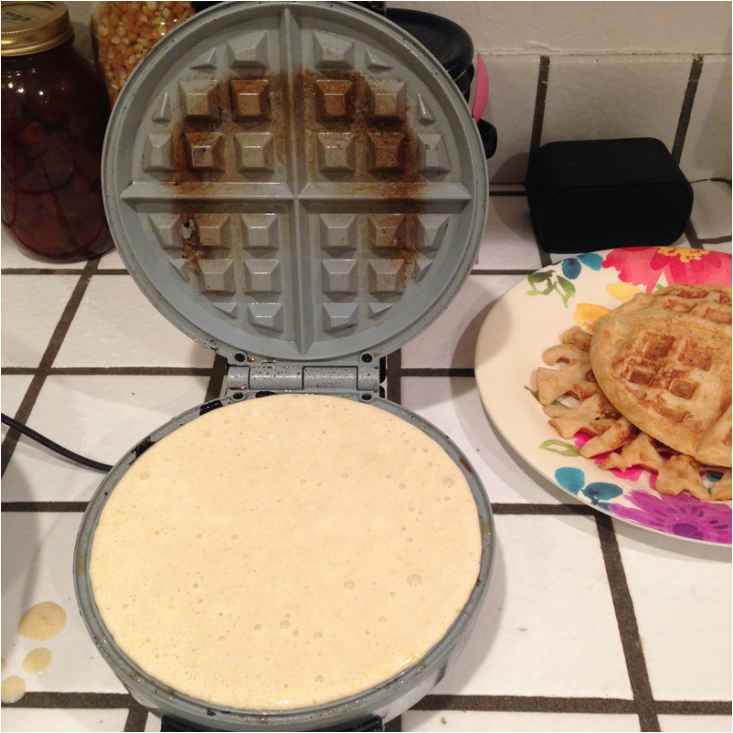
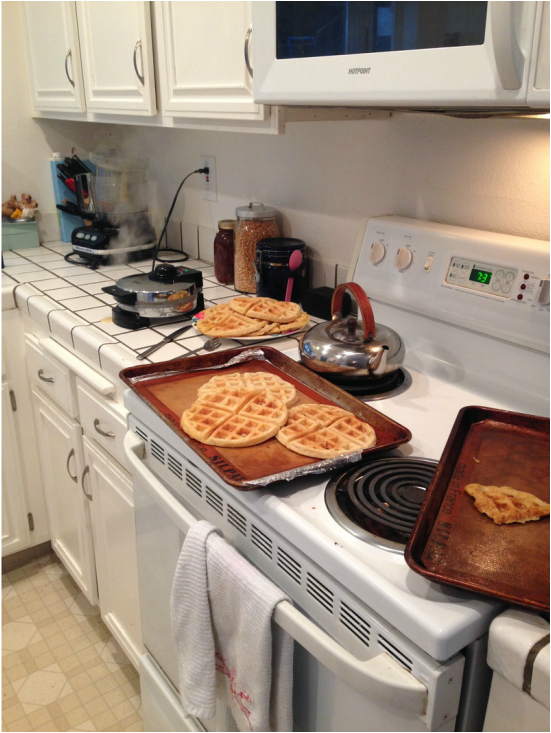
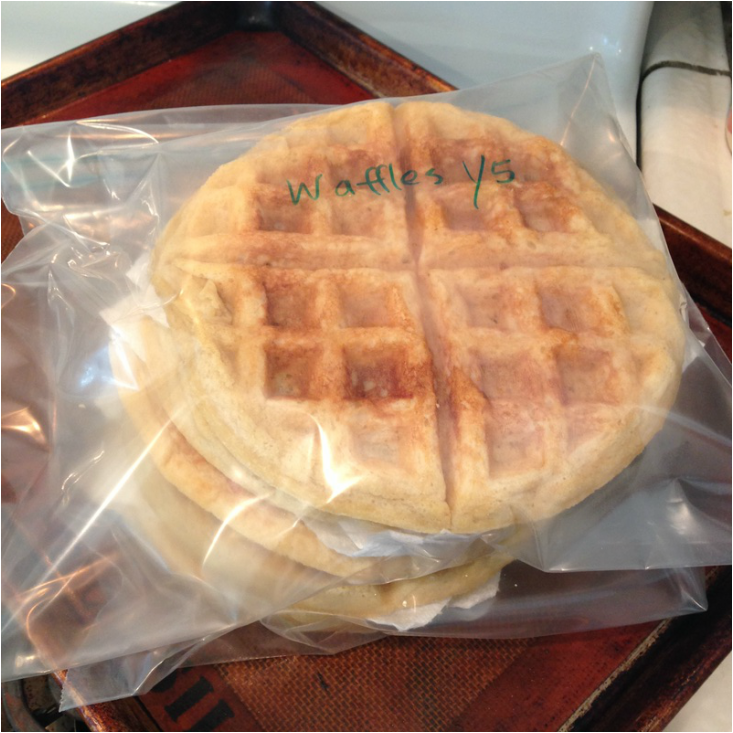
 There are probably a million waffle recipes out there, but this is the one I usually use. You prepare everything the night before so it's all ready to go in the morning. I think a lot of waffles taste like cardboard, but because of the whole wheat pastry flour and the little bit of sourness from the overnight fermentation these are a little more interesting. I double everything so that it makes a huge batch and then freeze enough for at least another two breakfasts. I have come upon this same recipe in one form or another at least three times, but most recently as Marion Cunningham's Yeast-Raised Waffles in Saveur Magazine. Here it is now where I can't lose it (doubled and with minor alterations). Ingredients: 1 tablespoon active dry yeast 4 cups milk 1 cup melted butter or coconut oil 2 teaspoons salt 2 teaspoons sugar 2 cups white flour 2 cups whole wheat pastry flour 4 eggs 1/2 teaspoon baking soda
Directions: Dissolve the yeast in a cup of warm water while you get out the rest of the ingredients. In a bowl, mix together all of the ingredients EXCEPT for the baking soda, cover it, and refrigerate overnight. In the morning, whisk in the baking soda and heat up your waffle iron. Cook it however you normally do, but I found that letting it sit for a minute before closing the iron resulted in fuller looking waffles. This made about thirteen waffles. I froze the leftovers for future mornings when I will split them in half and toast them.
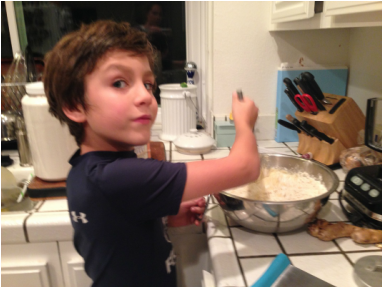 the proud kitchen helper who received the privilege of stirring
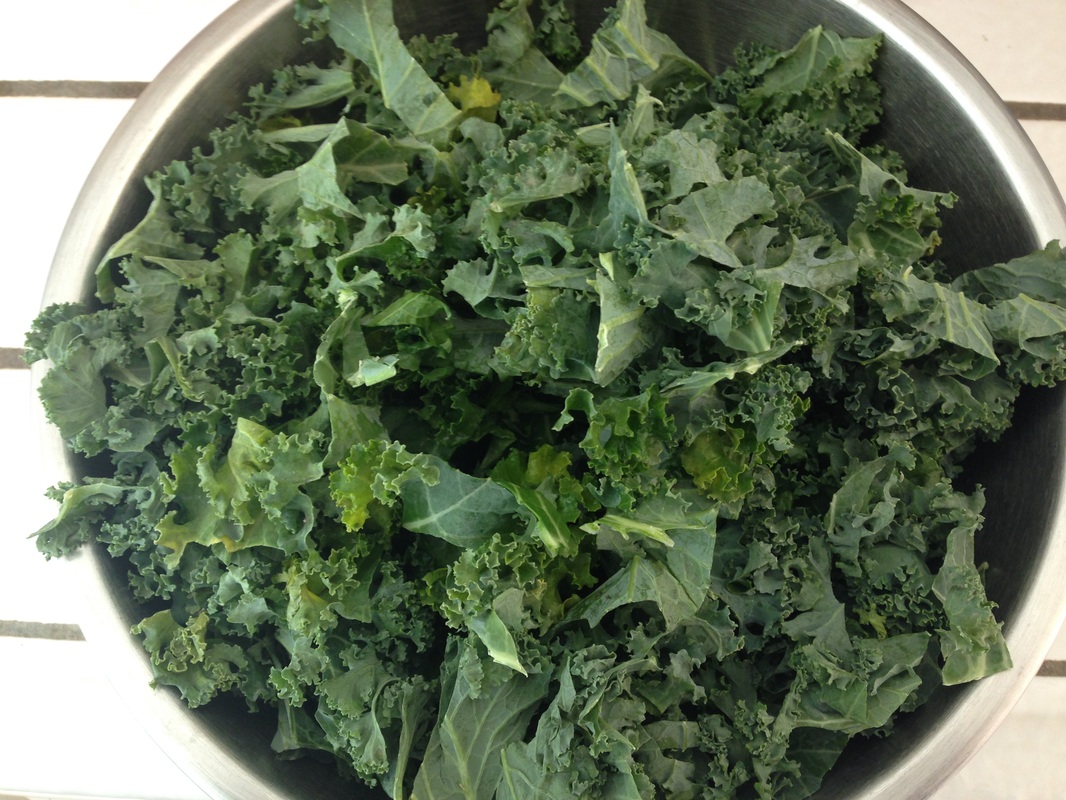
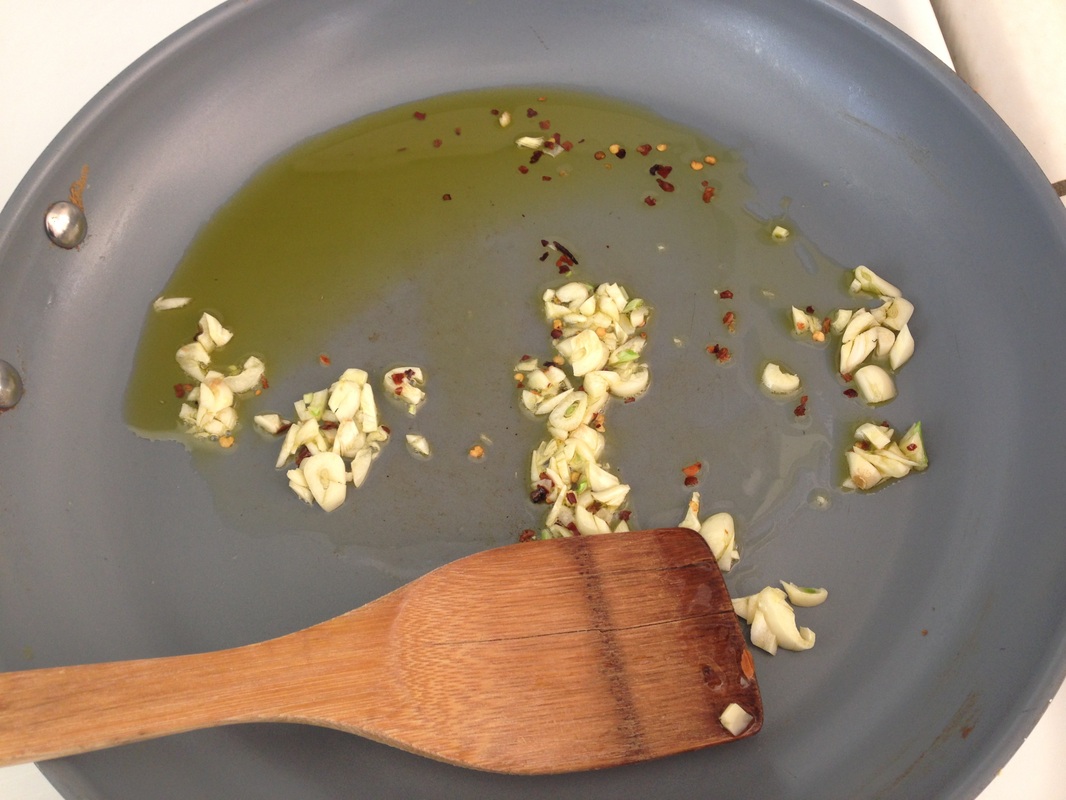
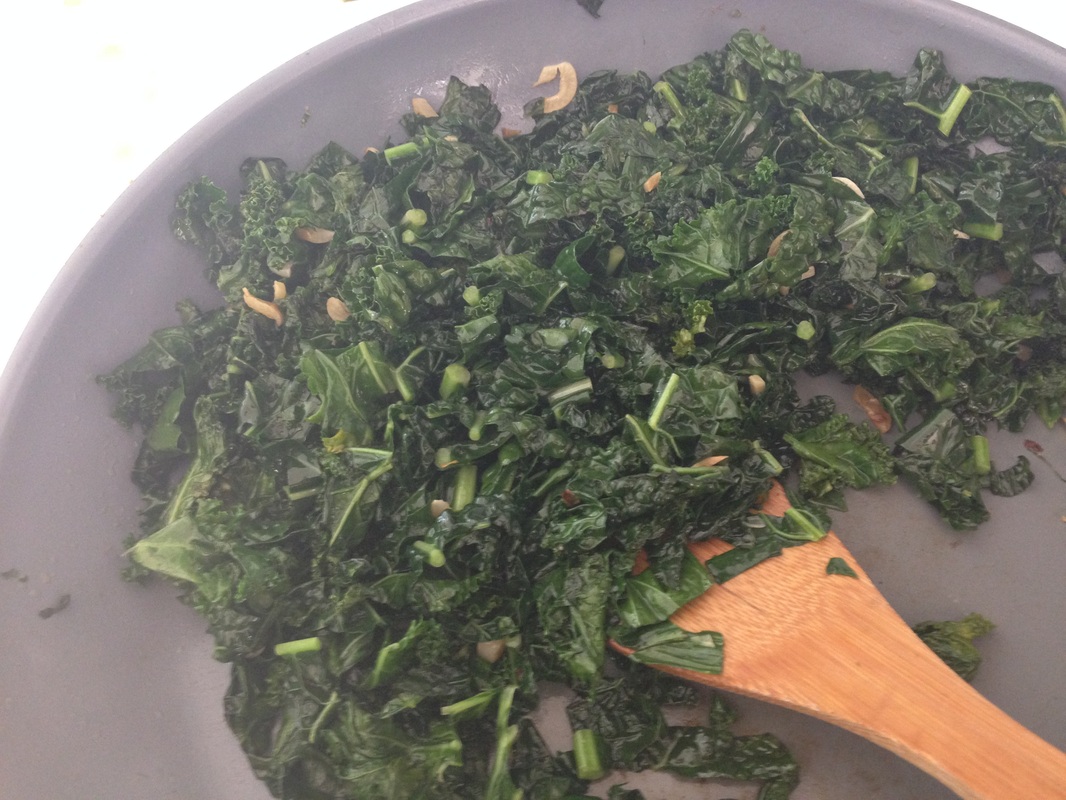
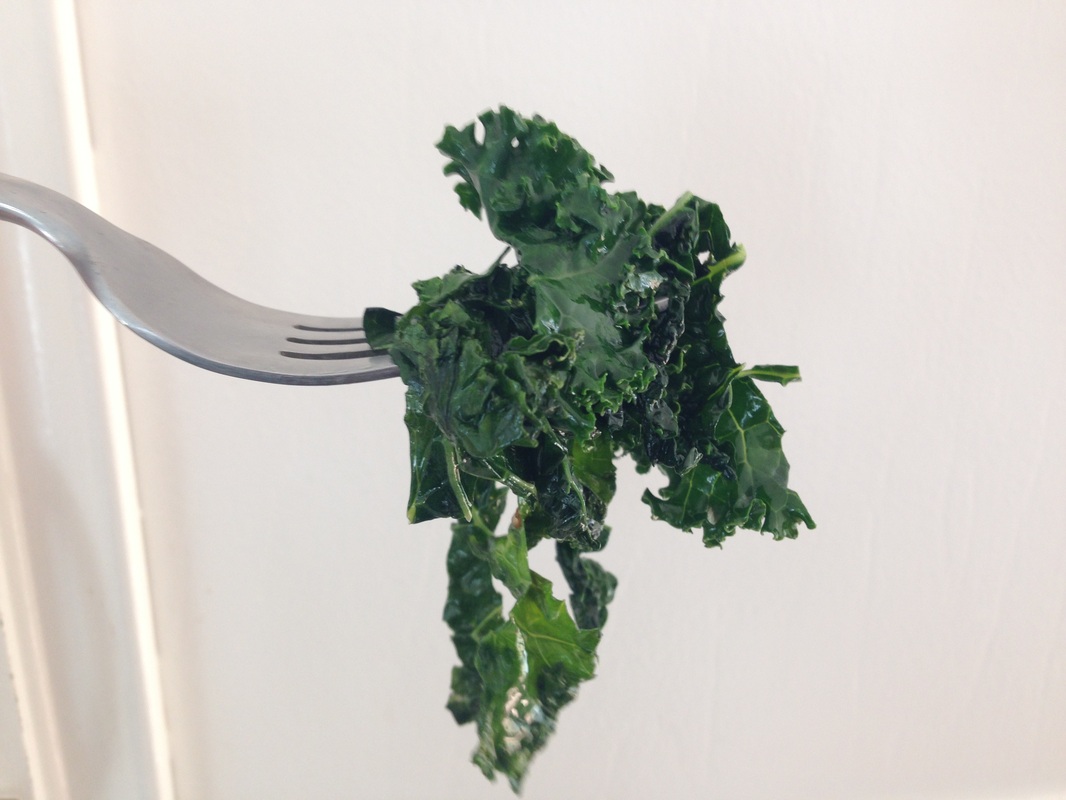
When I buy kale or swiss chard, I try to cook it immediately before I forget about it. Sometimes I buy it with a specific dish in mind, like a kale-white bean-sausage soup, or the torta recipe I posted last week, but more often I just clean it and cook it right away to use in soups or eat right out of the container. It never occurred to me to do this until I read about it in Tamar Adler's An Everlasting Meal. Ingredients: any mix in any amount of any leafy greens olive oil garlic red pepper flakes salt Directions: 1. Put the greens in a huge bowl and fill it with water. Swish the leaves around a little to remove any grit that has collected there, allow the grit to settle at the bottom of the bowl, and pull the greens out and put them in a strainer. Repeat this a few times until you are confident your greens are clean. 2. Cut out any thick stems and slice up the leaves. I used to leave the stems in, but sometimes it's nicer to save the chewier parts for stem pesto. 3. Heat some oil in a sauté pan and throw in some sliced garlic. Add some red pepper flakes as well. Before any of it starts to burn, throw in some of the leaves and salt them lightly. You may have to do this in batches depending on the size of your pan and how much you're cooking. Any water still on the greens will help them to steam. Keep stirring. It won't take long. You are now left with an oily, garlicky mess of. No more horrible fibrous reminders that you're doing this to cleanse your colon, to fight cancer, for calcium, or because you're supposed to. If you start eating them now, while the mess is still warm, you will finish it. But if you put it away for another day, here are some ideas for how you can use it.
 This sandwich is made with toasted bread, butter, sautéed greens, salt, pepper, a little lemon juice, and cheese. I know it doesn't sound like much, but it's really good. I haven't been able to stop at just one. 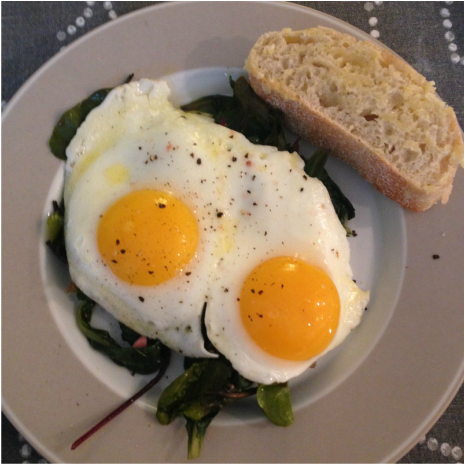 They're even good for breakfast.
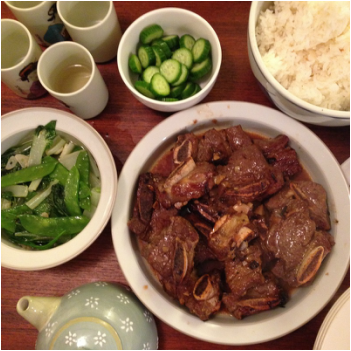
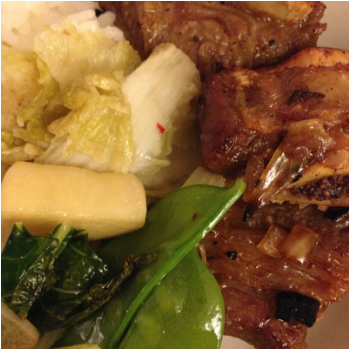
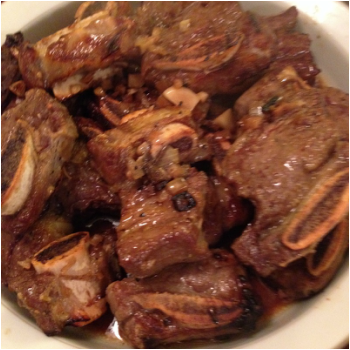
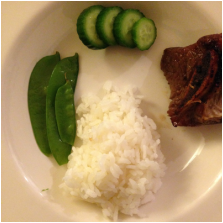
Oh yum. I used this on short ribs and then again with pork tenderloin. Delicious both times. The beef short ribs had the best flavor, but they were tough in spite of my best efforts to tenderize them. You can grill the meat or cook it under the broiler, but it tastes better grilled. We usually serve it with vinegared cucumbers, kim chi, and a fried vegetable. The traditional way with all the little sides would take an army. Suit yourself. 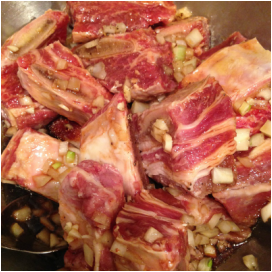 Ingredients: 2-3 pounds meat 1/2 onion, minced 1/2 bulb garlic, peeled and minced 1/3 cup soy sauce 3 tablespoons honey black pepper Directions: Mix all the other ingredients together for the marinade except for the meat. Put the meat in a bowl, stir in the marinade, and leave it covered in the refrigerator overnight. Grill the meat.
 My friend, enjoying real Korean BBQ the best way- at a restaurant.
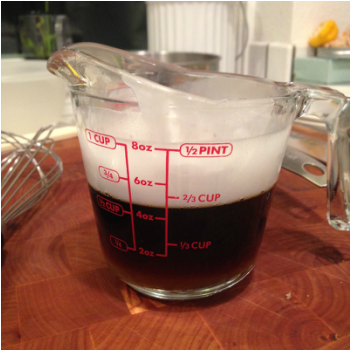
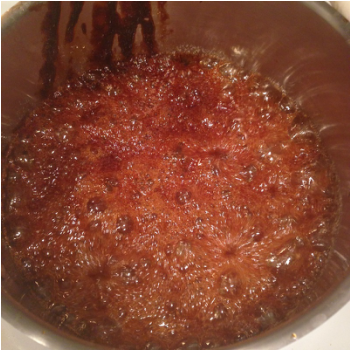
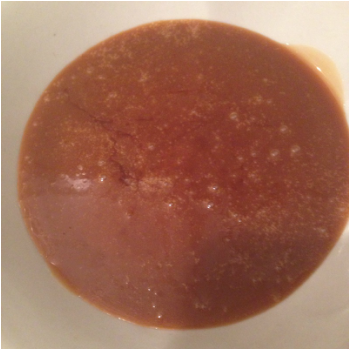
The plan was to make butterscotch pudding, but I didn't have scotch and made butter-bourbon instead. It was pretty good, but there's just no pleasing some people, especially people who truly love jell-o pudding. That's ok. What I dare anyone to criticize, however, was the caramel I made for this recipe. Once you try it, you'll want to whip this up every night after dinner. It's that good. Be prepared to burn your first batch. I did both times I made this. I also accidentally doubled the whipping cream the second time, and it didn't make a difference. This is simple, if not foolproof. If reading this makes you want butterscotch pudding more than just caramel sauce, try this recipe. It was great even though I did not adorn it with the toffee bits and whipped cream they recommended. Epicurious deserves full credit for this. Pour this over ice cream, pudding, cake, or bananas. Ingredients: 3/4 cup sugar 1/4 cup water 1/4 cup whipping cream Directions: Stir the sugar and water together in a medium saucepan over low heat until the sugar dissolves. Stop stirring, increase the heat to high, and let it go until the sugar turns a deep amber color. DON'T WALK AWAY. It doesn't take that long, and I burned my first batch. Once the syrup has turned a deep amber, take the saucepan off the heat and stir in the cream. It will bubble violently. 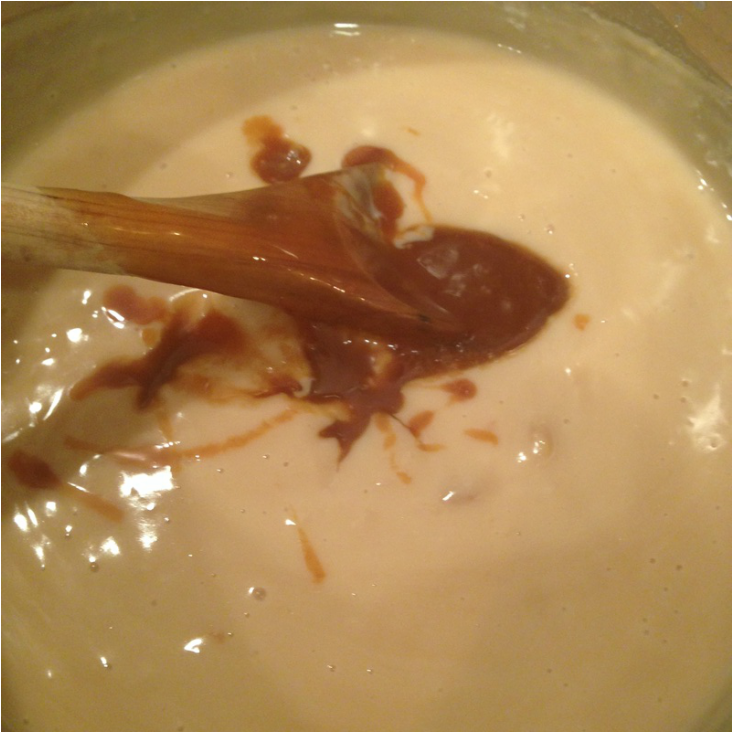 Stirred into butter-bourbon pudding. Yum. |
AuthorI love trying new foods, cooking, and gardening. I hope to share these experiences on this site. Thanks for taking a look! Categories
All
Archives
May 2020
|


 RSS Feed
Photos from Mechanoid Dolly, Mechanoid Dolly, fidber, Ken_Mayer, eflon, Dendroica cerulea, Urban_Integration
