BROKEN FLOUR
  • Blog
  • Contact
  • Local
  • Recipe Index
  • Chicken and Garden
  • Goats
  • Health

Rainbow Cookies for Spring

4/24/2015

0 Comments

 
Picture
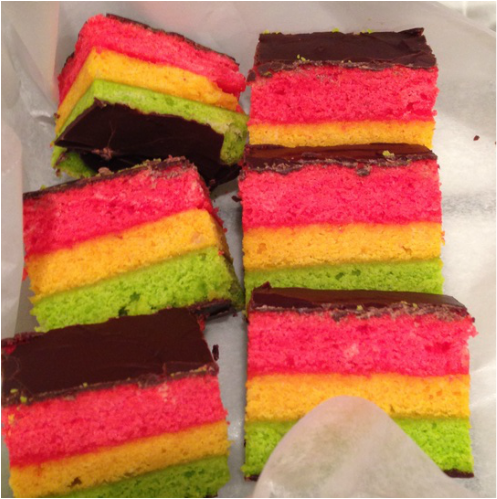
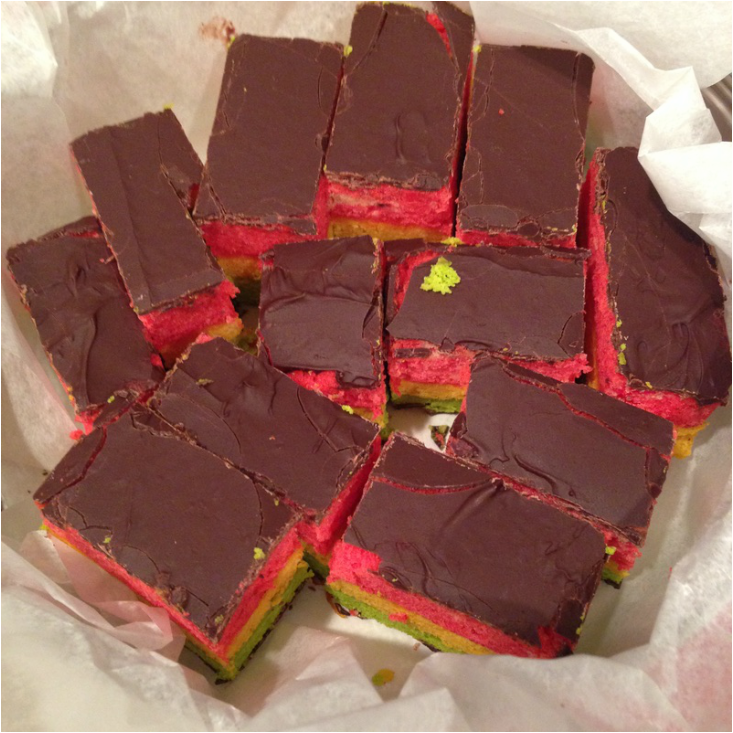
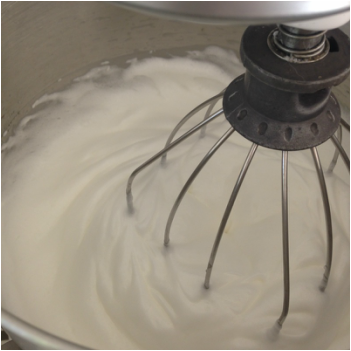
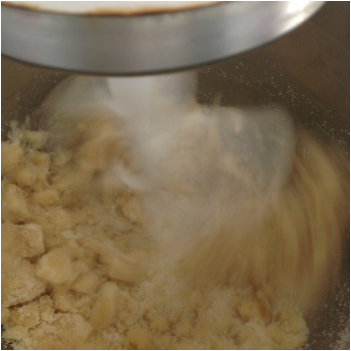
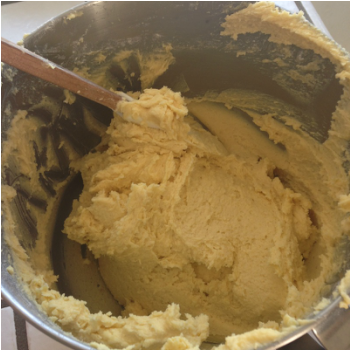
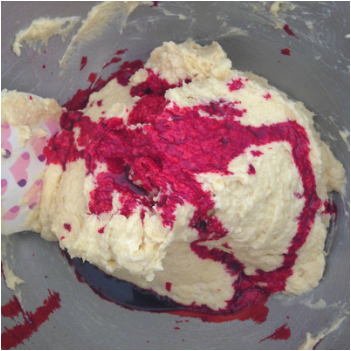
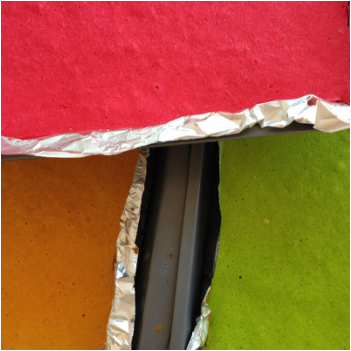
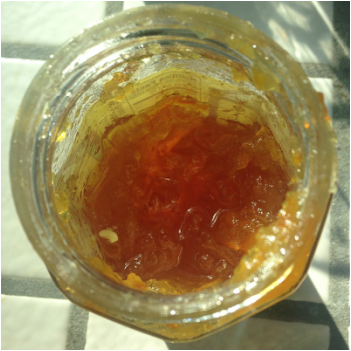
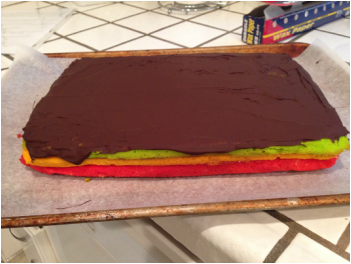
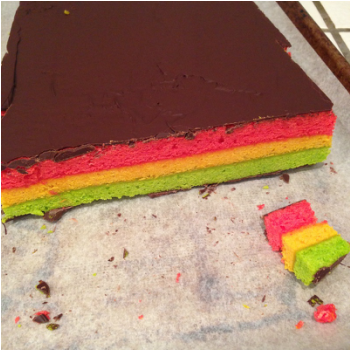
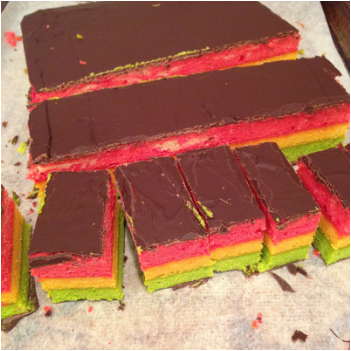
Except for the extreme hassle, the high price, and the irritating over-enthusiasm your children will bring to this project, it's a perfect recipe. It's also the only thing I've ever made that really, REALLY impressed my husband. If we make the drive to buy these in the city, we still pay $2-3 each. This recipe makes a LOT of cookies, and they freeze well. They are dense, almond flavored bits of heaven that go well with black coffee. Mmm. 

The original recipe claims that the only special equipment you need to make this are 3 9"x13" cake pans, and I suppose that's true, but you will also need a pastry brush, 2 baking sheets, wax paper, an icing spreader, 3 bowls, and a mixer. I believe this is pushing the limits of home baking, but the results are worth it. This is a great cookie. 

The colors are supposed to me red, white, and green like the Italian flag, but since I made this the day before Easter I tried pink, green, and yellow. Still pretty. I found this recipe a few years ago on epicurious.com. 
Picture
Ingredients:
2 cups unsalted butter at room temperature
non-stick cooking spray or extra butter
6 large eggs, separated
1 and 1/3 cups sugar
12 ounces of chopped almond paste, chopped
2-3/4 cups plus 1 tablespoon white flour (fussy!)
1 teaspoon red food coloring
1 teaspoon green food coloring
1 teaspoon salt
3/4 cup orange marmalade
about 1/2 pound semi-sweet chocolate chips
Directions:
Picture
First some prep work: Line three 13x9x2" baking pans with aluminum foil, leaving an overhang. Spray it with non-stick cooking spray or grease it with extra butter and set it aside. 

Beat the egg whites in a mixer until soft peaks form, slowly add 1/3 cup sugar, and then beat again until stiff peaks form. Transfer it to a large bowl. Cover the egg whites and chill them in the refrigerator until later. 
Picture
Using the paddle attachment on your mixer, beat the almond paste and one cup of sugar on low speed until it's really well mixed together, about five minutes. While that's mixing, cube the butter. Increase the mixer speed to medium-high and gradually add the two cups of butter. Beat it until it's fluffy, then beat in the yolks, then the flour and salt. 
Picture
Remove the bowl from the mixer and fold the refrigerated egg whites into the batter in two additions. This part will make your arms ache but lightens the batter to airy fluff. 
Picture
Next divide the batter as evenly as you can into three bowls. If you are making the traditional cookies, add a teaspoon of food coloring to one bowl, a teaspoon of green food coloring to another, and leave the third bowl plain. Mix the batter as thoroughly as you can so there are no streaks. 

Preheat the oven to 350 degrees. 
Picture
Spread one bowl of batter into each prepared pan and smooth the tops. This will feel like such a joke and you will be sure there isn't enough batter, but do your best to just spread it as close to the edges as you can. 

Bake the cakes for roughly 10 minutes. Check them frequently toward the end. You want to take them out as soon as the center looks cooked but before the edges brown. Allow the cakes to cool in the pans. 
Picture
While the cakes are cooling, heat the 3/4 cup of marmalade in a small saucepan. Strain it to remove the orange peel. The marmalade will have to be warm to spread it. 

Use a pastry brush to spread half the marmalade over the green cake. Use the foil overhang to lift the plain layer out of the pan and invert it onto the green cake. Throw out the foil and spread the rest of the marmalade over the plain layer. Lift the red layer out of the pan, invert it onto the plain layer, and cover the cake with foil. 
Picture
Top the cake with a pan so that two of them are nesting with the cake between them. Weigh the pan down with some cans and refrigerate the whole thing for 4-24 hours. 

Something like what you see to the left...
Picture
Remove the cans, the top pan, and the foil. Invert the cake onto a baking sheet lined with waxed paper. 

Melt the chocolate over a double-boiler (ideal) or in the microwave in thirty second increments (realistic). Spread half of the chocolate over the cake in the thinnest layer you can and then put the whole thing in the freezer for ten minutes for the chocolate to harden. 
Picture
Cover the cake with waxed, paper, invert it onto another lined baking sheet, remove the wax paper and spread the remaining chocolate over the top. Put it in the freezer again for another ten minutes. 

You are finally ready to slice it!

Trim the edges and then slice it crosswise into 2" strips. 
Picture
Slice the 2" strips into 1" sections. 

You're done! You have rainbow cookies!

I try to freeze about half of them to bring out later. 
Picture
0 Comments


Leave a Reply.

    Author

    I love trying new foods, cooking, and gardening. I hope to share these experiences on this site. Thanks for taking a look! 
            -Megan

    Categories

    All
    Afghani
    Apple
    Applesauce
    Artichoke
    Backyard
    Bacon
    Banana
    Beans
    Bean Sprouts
    Beef
    Beets
    Bell Peppers
    Big Batch
    Borage
    Bread
    Breakfast
    Burger
    Butternut Squash
    Cake
    California
    Cat
    Cauliflower
    Cherries
    Cherry
    Chicken
    Chinese
    Chocolate
    Chowder
    Clams
    Cod
    Coffee
    Colombian
    Cookie
    Cream
    Curry
    Custard
    Dessert
    Dinner
    Drink
    Early Summer
    Eggplant
    Eggs
    Fall
    Fennel
    Fenugreek
    Fruit
    Garden
    Goat
    Greek
    Green Beans
    Green Onion
    Greens
    Horror
    Hungarian
    Ice Cream
    Indian
    Iraqi
    Italian
    June
    Kids
    Korean
    Lamb
    Lebanese
    Liver
    Local
    Long Beans
    Lunch
    Mango
    Marinade
    May
    Meal Plan
    Menu Plan
    Milk
    Molokhia
    Muffins
    Mushroom
    Mushrooms
    Nagaimo
    Noodles
    North African
    Nose To Tail
    Okra
    Onigiri
    Orange
    Palestinian
    Pancake
    Pasta
    Peach
    Pea Shoots
    Pepperoncini
    Persian
    Pesto/sauce
    Pickles
    Pig
    Pizza
    Pomegranate
    Popsicles
    Pork
    Portuguese
    Potatoes
    Potluck
    Pumpkin
    Purslane
    Quick Lunch Ideas
    Radish
    Rice
    Salad
    Salmon
    Sandwich
    Sardines
    Sausage
    Shrimp
    Simmer Sauce
    Sindhi
    Slow Cooker
    Smoothie
    Snack
    Snap Peas
    Soup
    Spice Blend
    Spinach
    Spring
    Steak
    Stew
    Strawberries
    Strawberry
    Summer
    Tangerine
    Tea
    Thoughts
    Tomato
    Tortillas
    Tuna
    Vegetable Side
    Vegetarian
    Vinaigrette
    Walking Onion
    Walnuts
    Weekend Meal
    Weeknight Meal
    Whining
    Winter
    With Rice
    Wonton
    Yugoslavian
    Zombie Apocalypse
    Zucchini

    RSS Feed

    Archives

    May 2020
    April 2020
    November 2019
    October 2019
    September 2019
    May 2019
    February 2019
    December 2018
    June 2018
    December 2017
    October 2017
    July 2017
    May 2017
    March 2017
    January 2017
    October 2016
    September 2016
    August 2016
    July 2016
    June 2016
    May 2016
    March 2016
    February 2016
    January 2016
    December 2015
    November 2015
    October 2015
    September 2015
    August 2015
    July 2015
    June 2015
    May 2015
    April 2015
    March 2015
    February 2015
    January 2015
    December 2014
    November 2014
    October 2014
    September 2014
    August 2014

Powered by Create your own unique website with customizable templates.
Photos from Mechanoid Dolly, Mechanoid Dolly, fidber, Ken_Mayer, eflon, Dendroica cerulea, Urban_Integration
  • Blog
  • Contact
  • Local
  • Recipe Index
  • Chicken and Garden
  • Goats
  • Health